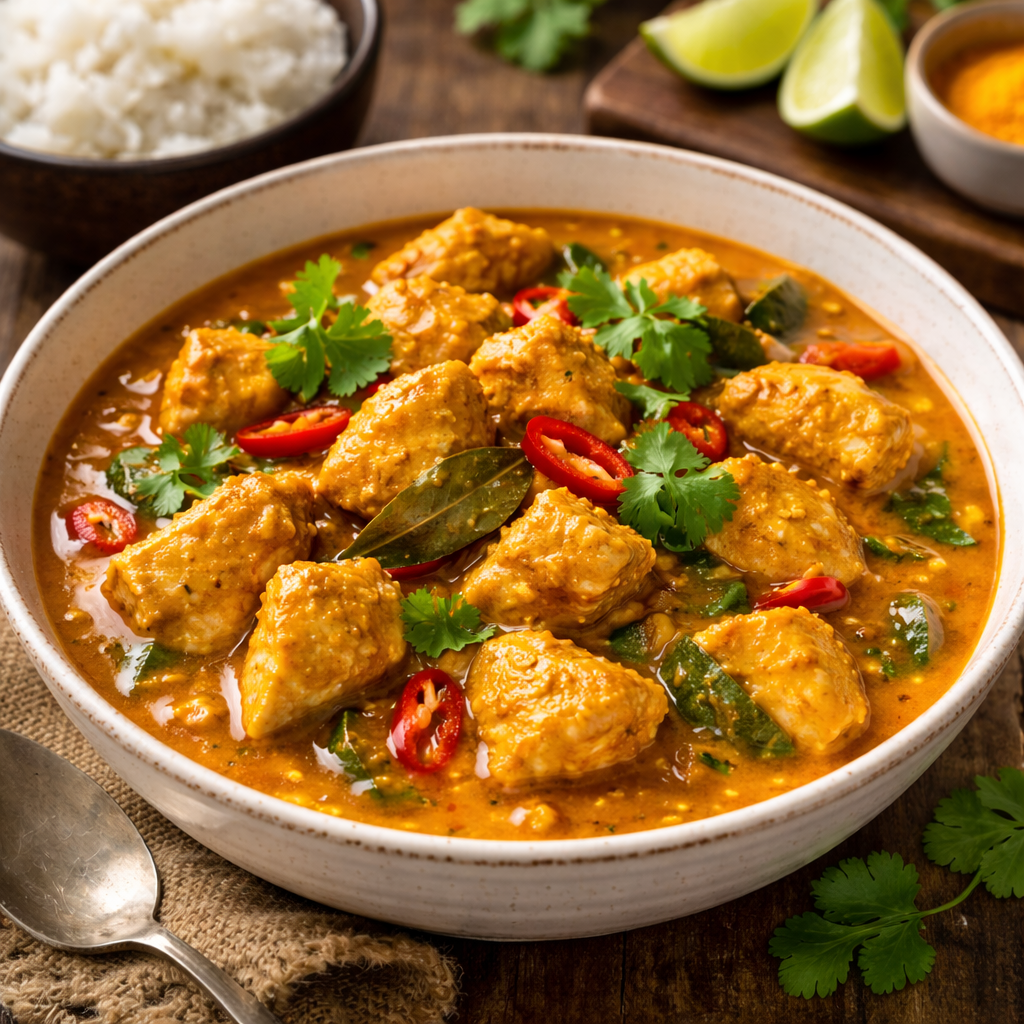
This Curry Chicken Will Make You Question Every Takeout Order You’ve Ever Placed You know that moment when you taste something and genuinely can’t believe you made it yourself?That’s what happens the first time you nail curry chicken at home.It’s rich, it’s deeply spiced, and the chicken gets so tender it practically falls apart. And the sauce? You’ll be spooning it over everything.
The thing that surprises most people is how simple this recipe actually is. No complicated techniques. No obscure ingredients. Just good food that tastes like it took way more effort than it did.
What You’ll Need
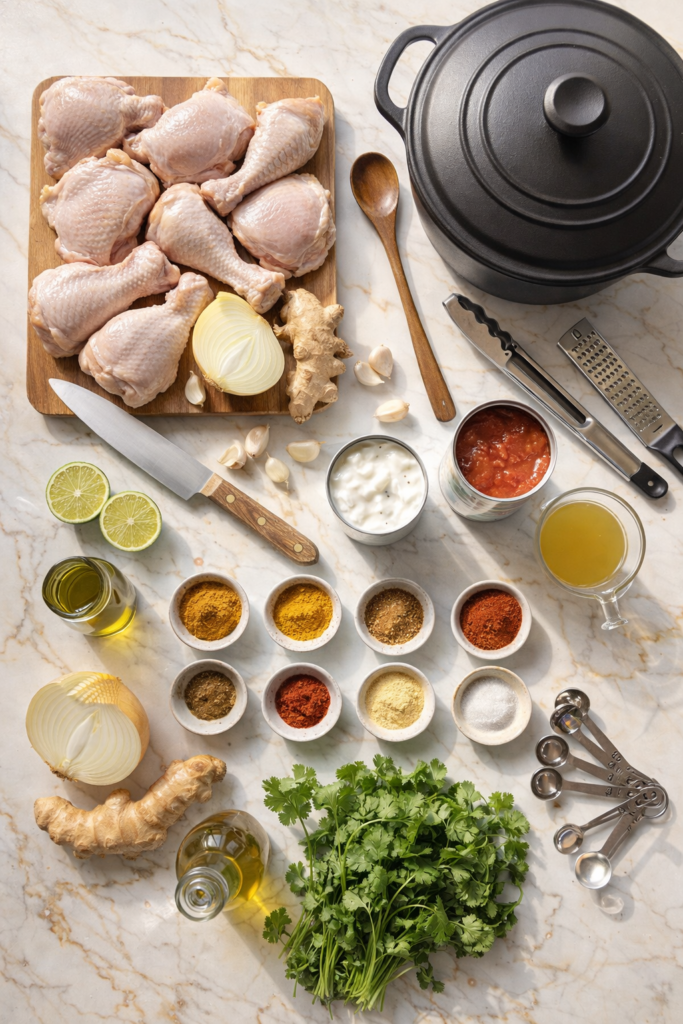
For the Chicken Marinade
2 lbs (900g) bone-in, skin-on chicken thighs and drumsticks
2 teaspoons curry powder
1 teaspoon garlic powder
1 teaspoon onion powder
1 teaspoon salt
½ teaspoon black pepper
1 tablespoon olive oil
For the Curry Sauce
2 tablespoons olive oil or coconut oil
1 large yellow onion, finely diced
6 garlic cloves, minced
1 tablespoon fresh ginger, grated
2 tablespoons curry powder
1 teaspoon turmeric
1 teaspoon cumin
½ teaspoon smoked paprika
½ teaspoon cayenne pepper (adjust to your heat preference)
1 can (14 oz / 400g) crushed tomatoes
1 can (13.5 oz / 400ml) full-fat coconut milk
1 cup chicken broth
1 teaspoon sugar (balances the acidity)
Salt to taste
Fresh cilantro for garnish
Lime wedges for serving
Tools You’ll Need
Large Dutch oven or deep skillet (at least 12 inches wide)
Cutting board and sharp chef’s knife
Wooden spoon or silicone spatula
Measuring spoons and cups
Grater or microplane (for the ginger)
Tongs (for handling the chicken)
Pro Tips
These are the things I really wish someone had told me before I started making curry at home.
- Toast your spices for 60 seconds before adding liquids.
This one step makes a massive difference. When spices hit hot oil, they bloom and release oils that you simply don’t get any other way. Don’t skip it. - Bone-in chicken is non-negotiable for flavor.
Boneless, skinless chicken breasts will work in a pinch, but the bones and skin add so much depth to the sauce while the chicken simmers. Go bone-in if you can. - Let the sauce reduce before adding coconut milk.
After you add the tomatoes, let the sauce cook down for a good 10 minutes before you pour in the coconut milk. Rushing this step is why some curries taste watery. - Taste and adjust at the end, not the beginning.
Spice levels shift a lot as the curry simmers. Season at the end, not just at the start. - The curry genuinely tastes better the next day.
This isn’t just a saying. The flavors meld overnight in a way that doesn’t happen the first time around. Make a big batch.
Substitutions and Variations
Chicken thighs → chicken legs or a whole cut-up chicken works just as well
Coconut milk → heavy cream for a richer, less tropical flavor profile
Crushed tomatoes → tomato paste + extra broth if that’s what you have on hand
Fresh ginger → 1 teaspoon ground ginger in a pinch (fresh is better though)
For a vegetarian version: swap chicken for chickpeas and cauliflower, use vegetable broth
For more heat: add a fresh scotch bonnet or habanero pepper, diced, with the onions
Curry powder blend: if you want a more complex flavor, use a mix of madras curry powder and garam masala
Make Ahead Tips
This is one of those recipes that actually gets better when you plan ahead.
Marinate the chicken overnight. Even 30 minutes helps, but overnight in the fridge takes the flavor to a different level entirely.
The entire curry can be made 2 days ahead and stored in an airtight container in the fridge. Reheat gently on the stove with a splash of broth if the sauce thickens too much.
The sauce (without the chicken) freezes well for up to 3 months. Cook fresh chicken and add it in when ready.
How to Make It
Step 1: Marinate the Chicken
Combine the chicken pieces with curry powder, garlic powder, onion powder, salt, pepper, and olive oil.
Toss until every piece is well coated.
Let it marinate for at least 30 minutes at room temperature, or overnight in the fridge. The longer, the better.
Step 2: Sear the Chicken
Heat 2 tablespoons of oil in your Dutch oven over medium-high heat.
Add the chicken, skin-side down, and sear for 4-5 minutes per side without moving it. You want a deep golden-brown crust.
Remove the chicken and set it aside. Don’t clean the pot.
Step 3: Build the Base
In the same pot (with all those beautiful brown bits still in there), reduce heat to medium.
Add the diced onion and cook for 5-7 minutes until soft and translucent.
Add the garlic and ginger. Cook for another 2 minutes until fragrant.
Step 4: Toast the Spices
Add the curry powder, turmeric, cumin, smoked paprika, and cayenne directly to the onion mixture.
Stir constantly for 60 seconds. The spices will darken slightly and smell incredible. That’s exactly what you want.
Step 5: Add the Liquids
Pour in the crushed tomatoes and stir to combine.
Let the mixture cook for 10 minutes, stirring occasionally, until the sauce deepens in color and thickens slightly.
Add the coconut milk, chicken broth, and sugar. Stir well and bring to a gentle simmer.
Step 6: Simmer the Chicken
Return the seared chicken to the pot, nestling the pieces into the sauce.
The sauce should come about halfway up the chicken.
Cover partially and simmer on low heat for 35-40 minutes, until the chicken is cooked through and tender.
Step 7: Taste, Adjust, and Serve
Taste the sauce. Adjust salt, heat, and balance as needed.
Serve over white rice or with warm naan bread.
Finish with fresh cilantro and a squeeze of lime.
Nutritional Breakdown (Per Serving, Serves 4)
Nutrient Amount
Calories ~520 kcal
Protein 38g
Fat 32g
Carbohydrates 14g
Fiber 3g
Sodium ~680mg
Values are approximate and will vary based on exact portions and chicken cuts used.
Diet-Friendly Swaps
Dairy-free: Already dairy-free as written ✓
Gluten-free: Already gluten-free as written ✓
Lower calorie: Use light coconut milk and remove chicken skin before eating
Keto-friendly: Skip the sugar, serve with cauliflower rice
What to Serve It With
Steamed basmati rice (classic for a reason)
Warm naan or roti
A simple cucumber raita (plain yogurt + cucumber + a pinch of cumin)
Roasted vegetables on the side
A cold lager or mango lassi if you really want to lean into it
Leftovers and Storage
Storage Method How Long
Fridge (airtight container) Up to 4 days
Freezer (sauce only, no chicken) Up to 3 months
Freezer (with chicken) Up to 2 months
Reheating tips:
Reheat on the stove over low heat, not the microwave if you can help it
Add a splash of chicken broth or water if the sauce has thickened
The chicken can get a little stringy when frozen and thawed, so it’s best fresh or within the first couple of days
FAQ
Can I use boneless chicken?
Yes, but reduce the simmering time to 20-25 minutes. Boneless chicken breasts can get dry if they simmer too long, so keep an eye on them.
My curry tastes bitter. What happened?
This usually happens when the spices burn. Make sure you’re toasting them on medium heat (not high), and don’t walk away during that 60-second window.
Can I make this in a slow cooker?
You can! Sear the chicken and build the sauce on the stove first, then transfer everything to the slow cooker and cook on LOW for 6-8 hours or HIGH for 3-4 hours.
How do I make it less spicy?
Skip the cayenne entirely and go with a mild curry powder. Coconut milk already mellows out the heat significantly.
What’s the best curry powder to use?
Madras curry powder gives you a deeper, slightly spicier flavor. Standard grocery store curry powder works perfectly fine too. S&B or McCormick are solid everyday options.
Do I have to marinate the chicken?
It helps a lot, but it isn’t strictly required. If you’re short on time, even a 15-minute marinade makes a difference over none at all.
Wrapping Up
If you’ve been putting off making curry at home because it seemed too complicated, I really hope this changes your mind.
It’s genuinely one of those recipes that sounds more impressive than it is. You toast some spices, build a sauce, let the chicken do its thing. An hour later, you’ve got something that honestly rivals anything you’d order in.
Give it a try this week. And when you do, leave a comment below and tell me how it went. Did you add more heat? Did you serve it with naan or rice? Did it actually taste better the next day?
I want to hear all of it. 👇