You know that dish that ruins all other dinners for you?
This is it.
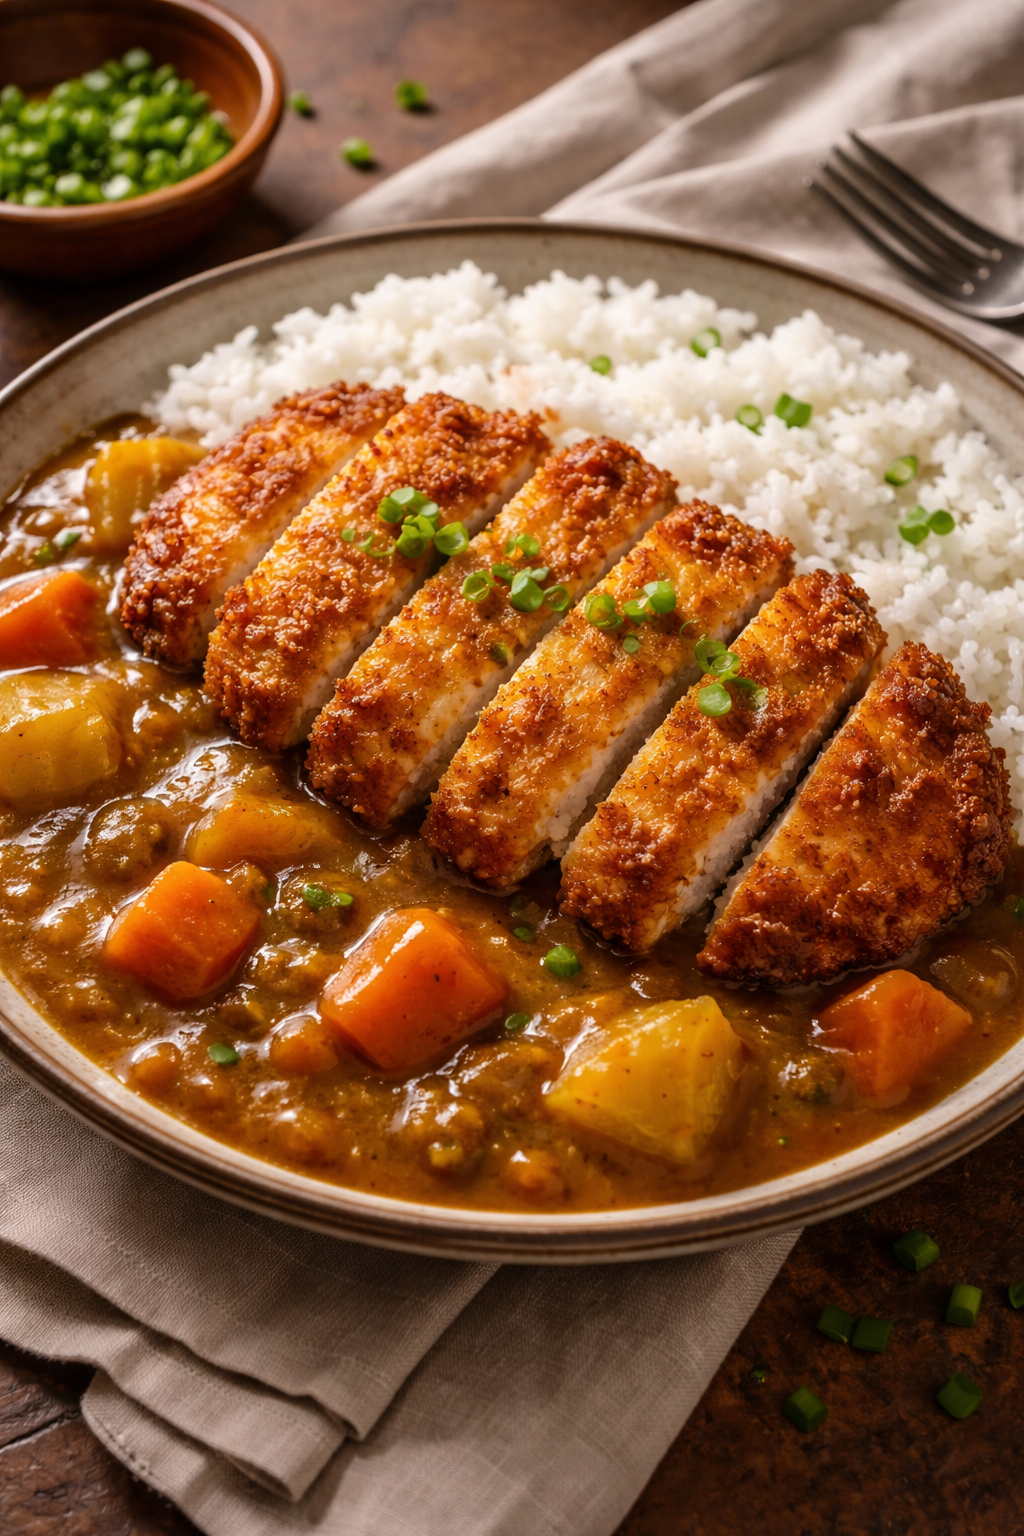
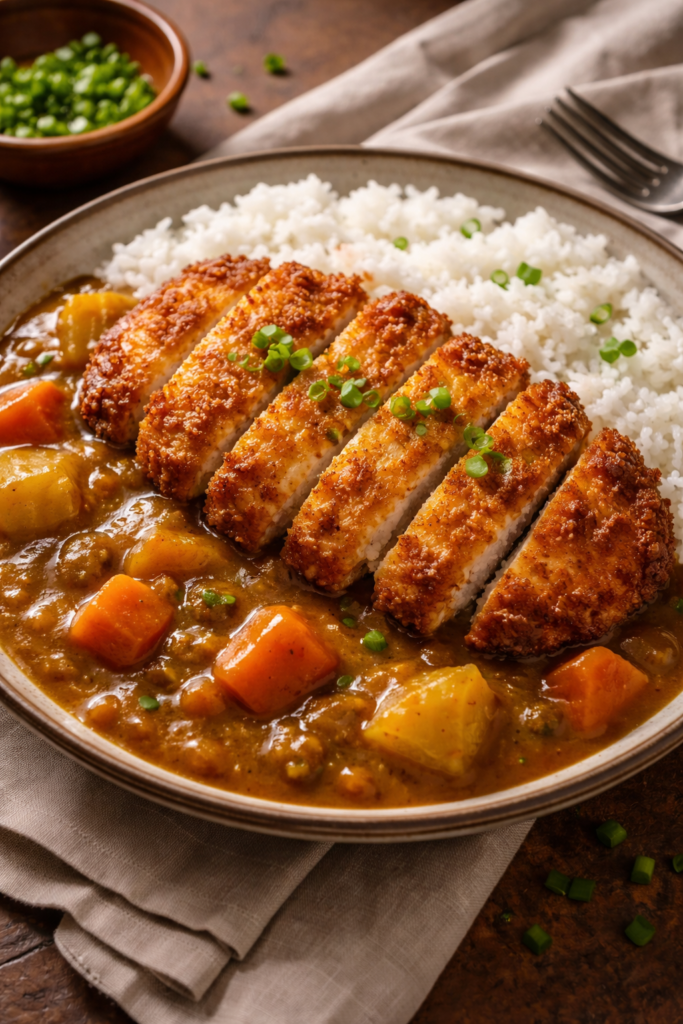
Crispy, golden fried chicken. A rich, silky Japanese curry sauce. Fluffy white rice underneath all of it. Chicken katsu curry is the kind of meal that makes you genuinely excited to cook on a Tuesday night.
And the surprising part? It’s not complicated. At all.
Japan actually imported the concept of curry from Britain in the 1800s, who had picked it up from India during colonial times. So what you’re eating is this incredible, multi-continent food journey that somehow ended up tasting better than all its origins. 🍛
Once you learn how to make it at home, takeout just doesn’t hit the same.
What You’ll Need
For the Chicken Katsu
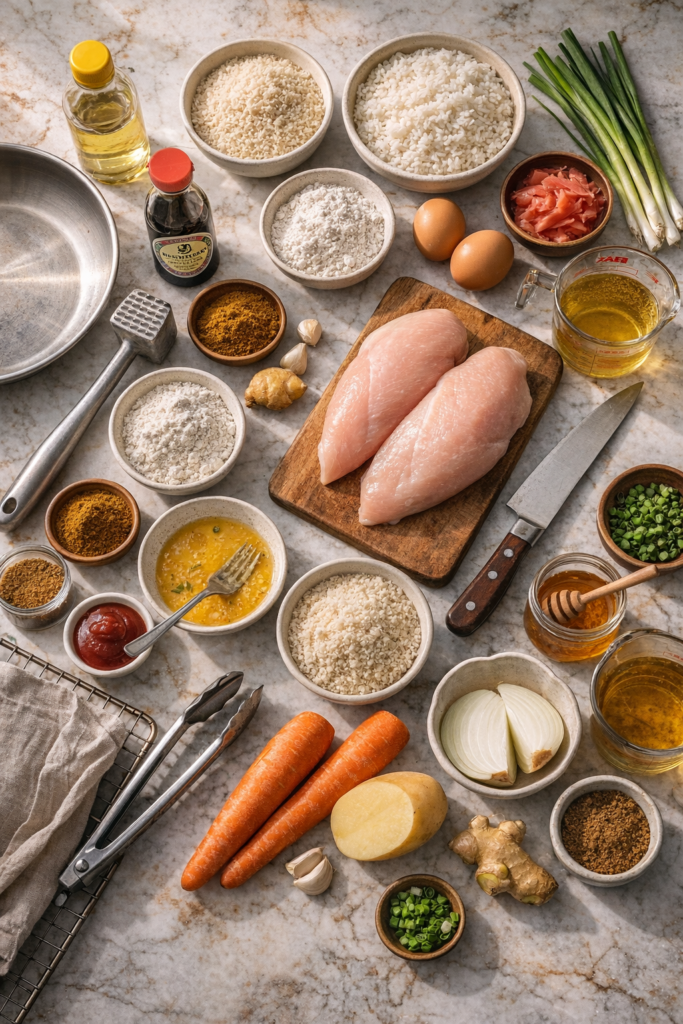
- 2 large boneless, skinless chicken breasts
- 1 cup panko breadcrumbs
- ½ cup all-purpose flour
- 2 large eggs, beaten
- 1 tsp salt
- ½ tsp black pepper
- Vegetable oil, for frying (about 2 cups)
For the Japanese Curry Sauce
- 2 tbsp vegetable oil
- 1 large onion, finely diced
- 2 garlic cloves, minced
- 1 tsp fresh ginger, grated
- 2 medium carrots, peeled and diced
- 1 medium potato, peeled and diced
- 2 tbsp Japanese curry powder (or S&B curry powder)
- 1 tbsp garam masala
- 2 tbsp all-purpose flour
- 2½ cups chicken stock
- 1 tbsp soy sauce
- 1 tbsp ketchup
- 1 tsp honey
- Salt to taste
For Serving
- 2 cups Japanese short-grain white rice, cooked
- Pickled ginger (optional but highly recommended)
- Finely sliced green onions, for garnish
Tools You’ll Need
- Large frying pan or skillet (for the katsu)
- Medium saucepan (for the curry)
- Meat mallet or rolling pin
- 3 shallow bowls (for the breading station)
- Tongs
- Wire rack or plate lined with paper towels
- Sharp knife and cutting board
- Wooden spoon or silicone spatula
Pro Tips
These are the things I wish someone had told me the first time I made this.
- Pound the chicken thin. Aim for about ½ inch thickness. It cooks faster and more evenly, and the crust-to-chicken ratio is just better.
- Panko is non-negotiable. Regular breadcrumbs will give you a sad, dense crust. Panko gives you that audible crunch that makes this dish what it is. Don’t skip it.
- Rest the breaded chicken for 10 minutes before frying. This helps the coating stick and stops it from falling off in the oil.
- Keep your oil temperature steady at 340°F (170°C). Too hot and the outside burns before the inside cooks. Too cool and it absorbs oil and goes soggy. A thermometer here is genuinely worth it.
- Make the curry sauce first. It gets better as it sits. Cook it, let it rest, and by the time your katsu is done, the flavors have had time to develop and deepen.
How to Make Chicken Katsu Curry
Step 1: Cook the Rice
Start your rice first so everything finishes at the same time.
Rinse 2 cups of short-grain white rice until the water runs clear, then cook according to package instructions. Keep it covered and warm until serving.
Step 2: Make the Curry Sauce
Heat 2 tbsp of vegetable oil in a medium saucepan over medium heat.
Add the diced onion and cook for 8-10 minutes, stirring occasionally, until soft and lightly golden. Don’t rush this part. The caramelized onion is where a lot of the flavor comes from.
Add the garlic and ginger, stir for 1 minute.
Add the carrots and potato, stir to coat.
Sprinkle in the curry powder, garam masala, and flour. Stir everything together and cook for 2 minutes. It’ll look a little dry and clumpy — that’s fine.
Slowly pour in the chicken stock, stirring constantly to avoid lumps.
Add the soy sauce, ketchup, and honey. Bring to a gentle simmer.
Cook uncovered for 15-20 minutes until the vegetables are soft and the sauce has thickened. Season with salt to taste.
If the sauce is too thick, add a splash more stock. Too thin, let it simmer a little longer.
Step 3: Bread the Chicken
While the curry simmers, set up your breading station:
- Bowl 1: flour, salt, and pepper
- Bowl 2: beaten eggs
- Bowl 3: panko breadcrumbs
Place each chicken breast between two sheets of plastic wrap and pound to ½ inch thickness.
Coat in flour (shake off the excess), dip in egg, then press firmly into the panko. Make sure it’s fully coated.
Let the breaded chicken rest on a plate for 10 minutes.
Step 4: Fry the Chicken
Pour about 1 inch of vegetable oil into a large skillet and heat to 340°F (170°C).
Carefully lower one chicken breast into the oil. Fry for 4-5 minutes per side until deep golden brown and cooked through (internal temperature: 165°F / 74°C).
Transfer to a wire rack or paper-towel-lined plate. Repeat with the second breast.
Let rest for 2 minutes, then slice diagonally into strips.
Step 5: Assemble and Serve
Spoon rice onto each plate. Pour the curry sauce generously alongside (or over) the rice. Lay the sliced katsu on top.
Garnish with sliced green onions and pickled ginger on the side.
Eat immediately. This does not get better sitting around.
Substitutions & Variations
Chicken thighs work great here if you prefer darker meat. More juicy, slightly richer flavor.
Pork loin is the traditional katsu cut used in Japan. Pound it to the same thickness and follow the exact same steps.
Tofu katsu is a solid vegetarian swap. Use firm tofu, press out the moisture, and follow the same breading process. Works surprisingly well.
Store-bought Japanese curry roux (like Golden Curry or Vermont Curry blocks) cuts your sauce time in half and tastes really good. If you’re short on time, this is worth knowing about.
Gluten-free? Use rice flour instead of all-purpose, tamari instead of soy sauce, and GF breadcrumbs or crushed rice crackers for the crust.
Make-Ahead Tips
The curry sauce is actually better made a day ahead. The flavors mellow and deepen overnight in the fridge. Just reheat gently on the stove with a splash of stock if it thickens too much.
You can also bread the chicken up to 2 hours ahead and keep it in the fridge uncovered. The coating firms up even more, which means an even crispier crust when it hits the oil.
Nutrition Information (Per Serving)
| Amount | |
|---|---|
| Calories | ~620 kcal |
| Protein | 42g |
| Carbohydrates | 65g |
| Fat | 18g |
| Fiber | 4g |
| Sodium | 890mg |
Based on 2 servings. Numbers are approximate.
Meal Pairing Suggestions
This is a complete meal on its own, but if you want to build it out:
- Miso soup on the side is a classic Japanese pairing
- Simple cucumber salad with rice vinegar and sesame seeds cuts through the richness nicely
- Japanese potato salad (which is creamier and slightly sweet) works really well alongside it
- For drinks: sparkling water with yuzu, or a cold Japanese lager
Leftovers & Storage
Curry sauce keeps well in the fridge for up to 4 days. It also freezes beautifully for up to 3 months. Store it separately from the rice.
Cooked katsu is best eaten fresh, but if you have leftovers, store them uncovered in the fridge (not wrapped tightly — the steam makes it soggy). Reheat in an oven or air fryer at 375°F for 8-10 minutes to bring back some of the crunch.
Do not microwave the katsu. I’m saying this with love. The microwave turns that perfect crust into sadness.
FAQ
Can I use an air fryer for the chicken? Yes. Spray the breaded chicken generously with oil spray and cook at 375°F (190°C) for 12-15 minutes, flipping halfway. It won’t be quite as deeply golden as pan-fried, but the crust is still genuinely good and it’s a lot less messy.
What’s the difference between Japanese curry and Indian curry? Japanese curry is milder, sweeter, and thicker. It has a more stew-like consistency with a subtle sweetness from ingredients like apple or honey. Indian curries tend to be brighter, more aromatic, and spice-forward. They’re quite different eating experiences.
My breading keeps falling off. What went wrong? Usually one of three things: the chicken was too wet before breading (pat it completely dry first), the coating wasn’t pressed on firmly enough, or it went straight into the oil without resting. Let it sit for 10 minutes before frying.
Can I make this dairy-free? It already is! The traditional version of this recipe contains no dairy. Just double-check your curry powder blend if you’re buying pre-mixed.
Is this kid-friendly? Very. The Japanese curry sauce is mild and slightly sweet. If you’re cooking for kids who are sensitive to any spice, cut the curry powder down to 1 tbsp and skip the garam masala.
Wrapping Up
Chicken katsu curry is one of those recipes that looks impressive, tastes like it took serious skill, and is secretly very manageable on a weeknight.
The crispy chicken. The rich, golden curry sauce. The soft rice underneath it all. It’s comfort food in the best possible way.
Make it this week. Then come back here and tell me how it went in the comments below. Did you go classic, or did you try one of the variations? Any questions along the way? Drop them down there and I’ll get back to you. 👇