I made this cake for a friend’s birthday last year and she genuinely asked me if I had bought it from a bakery.
I hadn’t. I made it in my kitchen, with simple ingredients, in under an hour.
That’s the thing about a really good chocolate cake. It doesn’t need to be complicated. It just needs the right technique and a few tricks that most recipes skip right over.
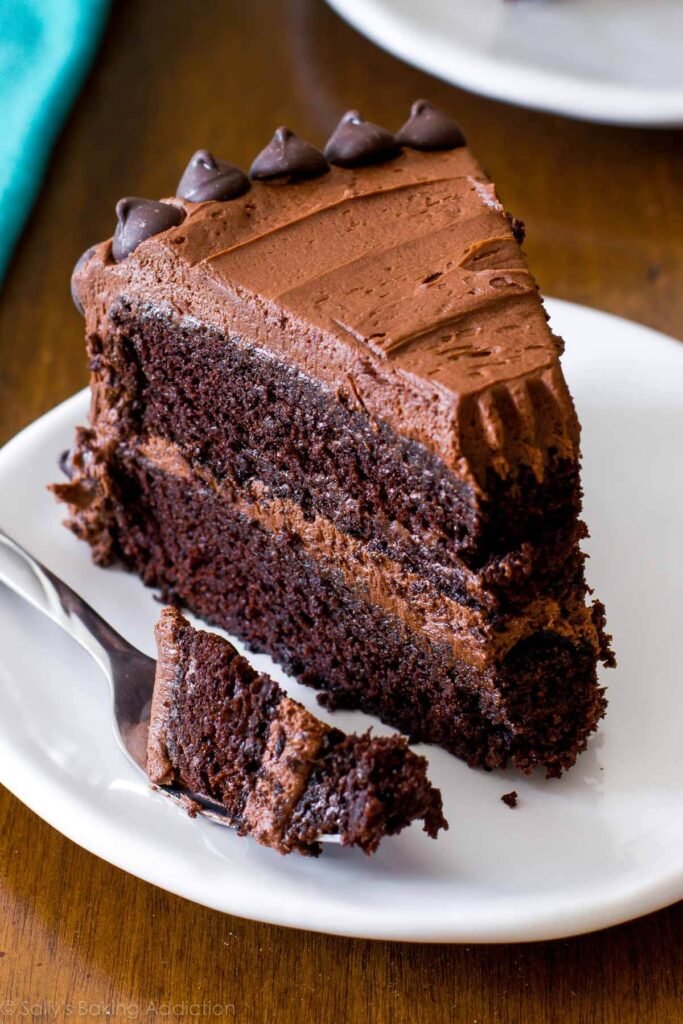
This one has a deep, almost fudgy crumb, a frosting that’s glossy and rich without being too sweet, and it stays incredibly moist for days. Like, genuinely days.
Stick around because I’m sharing my pro tips partway through that honestly make or break this whole recipe. Don’t skip them.
What You’ll Need
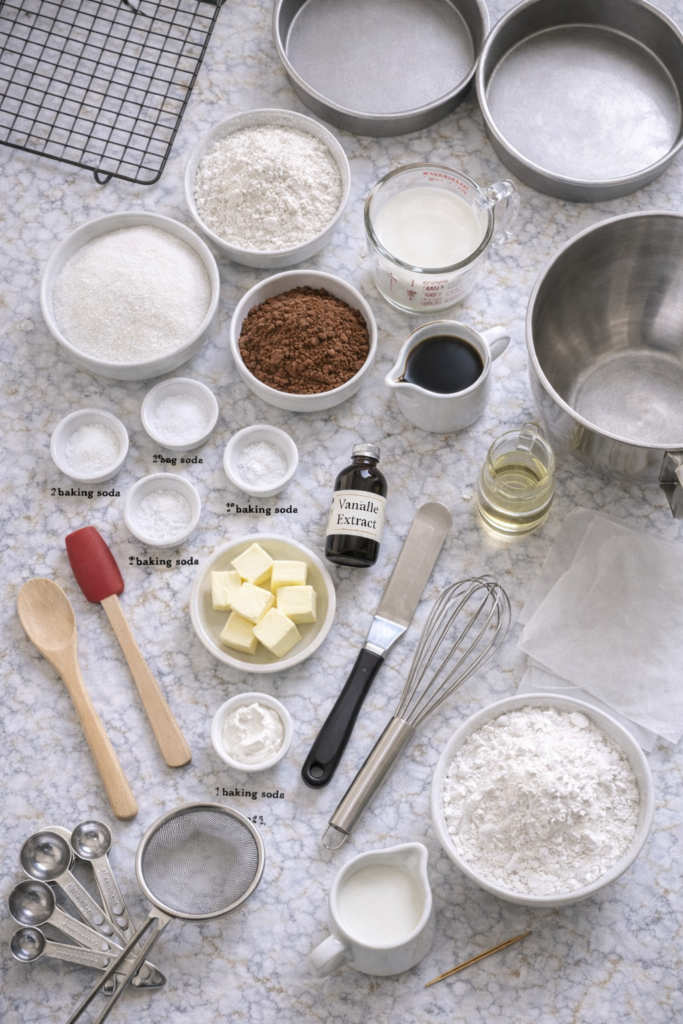
For the Cake
- 2 cups (250g) all-purpose flour
- 2 cups (400g) granulated white sugar
- ¾ cup (75g) unsweetened cocoa powder (Dutch-process works best)
- 2 tsp baking soda
- 1 tsp baking powder
- 1 tsp fine sea salt
- 2 large eggs, room temperature
- 1 cup (240ml) buttermilk, room temperature
- 1 cup (240ml) hot coffee (strongly brewed)
- ½ cup (120ml) vegetable oil
- 2 tsp pure vanilla extract
For the Chocolate Buttercream Frosting
- 1 cup (225g) unsalted butter, softened
- 3 cups (360g) powdered sugar, sifted
- ½ cup (50g) unsweetened cocoa powder, sifted
- 3–4 tbsp heavy cream
- 2 tsp pure vanilla extract
- Pinch of salt
Tools You’ll Need
- Two 9-inch round cake pans
- Stand mixer or electric hand mixer
- Large mixing bowl
- Medium mixing bowl
- Rubber spatula
- Whisk
- Offset spatula (for frosting)
- Wire cooling rack
- Sifter or fine mesh sieve
- Toothpick (for testing doneness)
- Measuring cups and spoons
- Kitchen scale (optional but genuinely helpful)
Pro Tips
These are the things I wish someone had told me the first time I made this.
1. Use hot coffee, not hot water. Coffee doesn’t make the cake taste like coffee. It deepens the chocolate flavor in a way that’s almost hard to explain until you try it. Hot water works in a pinch, but coffee is the move.
2. Room temperature ingredients are non-negotiable. Cold eggs and cold buttermilk don’t incorporate the same way. You’ll end up with a slightly uneven batter and a denser crumb. Pull everything out of the fridge about 30 minutes before you start.
3. Don’t overmix the batter. Once the dry and wet ingredients are combined, mix just until you don’t see streaks of flour. Overmixing develops gluten and makes the cake tough instead of tender.
4. Let the cakes cool completely before frosting. I know. It’s hard to wait. But if you frost even a slightly warm cake, the buttercream will melt into the crumb and slide right off. Give it at least an hour on the wire rack.
5. Sift your cocoa powder. Cocoa powder clumps. Lumpy batter = uneven texture. It takes 30 seconds with a sieve and it genuinely matters.
Substitutions & Variations
No buttermilk? Mix 1 cup whole milk with 1 tbsp white vinegar or lemon juice. Let it sit for 5 minutes until it curdles slightly. Works perfectly.
No coffee? Use hot water with 1 tsp of instant espresso powder dissolved in it. Or just plain hot water if you’re in a pinch.
Dairy-free? Swap buttermilk for oat milk + 1 tbsp apple cider vinegar, and use vegan butter in the frosting. It still tastes really good.
Gluten-free? A 1:1 gluten-free baking flour (like Bob’s Red Mill) works here. The texture is slightly different but still delicious.
Want a mocha version? Add 1 tbsp instant espresso powder directly to the frosting. It adds a subtle depth that’s a little addictive.
Single layer? You can bake this in a 9×13-inch pan instead. Reduce baking time to 35-40 minutes and check with a toothpick.
Make Ahead Tips
The cake layers: Bake, let them cool completely, then wrap tightly in plastic wrap and store at room temperature for up to 2 days, or freeze for up to 3 months.
The frosting: Make it up to 5 days ahead and store it in an airtight container in the fridge. Before using, let it come to room temperature and re-whip for a couple minutes.
The fully assembled cake: Frost the cake, refrigerate uncovered for 30 minutes until the frosting is set, then cover loosely. It keeps in the fridge for up to 4 days.
Nutritional Info (Per Slice, Approx. 1/12 of Cake)
| Amount | |
|---|---|
| Calories | ~520 kcal |
| Total Fat | 26g |
| Saturated Fat | 12g |
| Carbohydrates | 70g |
| Sugars | 52g |
| Protein | 5g |
| Fiber | 3g |
| Sodium | 320mg |
These are estimates and will vary slightly based on exact brands used.
Meal Pairing Suggestions
This cake pairs beautifully with:
- A scoop of vanilla bean ice cream (honestly the classic for a reason)
- Fresh raspberries or strawberries on the side
- A strong cup of black coffee or espresso
- A glass of whole milk (if you’re leaning into the nostalgia)
How to Make It
Step 1: Preheat your oven to 350°F (175°C). Grease your two 9-inch cake pans with butter or non-stick spray, then line the bottoms with parchment paper. This step is what keeps your layers from sticking, so don’t skip it.
Step 2: Mix your dry ingredients. In a large bowl, whisk together the flour, sugar, cocoa powder, baking soda, baking powder, and salt. Make sure everything is evenly combined.
Step 3: Mix your wet ingredients. In a separate bowl, whisk the eggs, buttermilk, vegetable oil, and vanilla extract until smooth.
Step 4: Combine wet + dry. Pour the wet ingredients into the dry ingredients and mix with a rubber spatula or on low speed until just combined. Don’t overmix.
Step 5: Add the hot coffee. Pour in the hot coffee and gently stir until the batter is smooth. The batter will be quite thin at this point, and that’s totally normal. It’s supposed to look that way.
Step 6: Divide and bake. Pour the batter evenly between your two prepared cake pans. Bake for 30-35 minutes, or until a toothpick inserted into the center comes out clean (a few moist crumbs are fine, wet batter is not).
Step 7: Cool completely. Let the cakes cool in the pans for 10 minutes, then turn them out onto wire racks. Let them cool completely before moving on to frosting. This is a great time to make your frosting.
Step 8: Make the frosting. Beat the softened butter on medium-high speed for about 2 minutes until pale and fluffy. Add the sifted powdered sugar and cocoa powder in batches, mixing on low after each addition. Add vanilla, a pinch of salt, and heavy cream one tablespoon at a time until the frosting is smooth, creamy, and spreadable.
Step 9: Frost the cake. Place one cake layer on your serving plate or cake stand. Spread a generous layer of frosting on top. Place the second layer on top, then frost the top and sides of the cake with the remaining frosting.
Step 10: Serve and enjoy. Slice it up, watch people’s reactions, and feel really good about yourself. 😄
Leftovers & Storage
Room temperature: Cover the cake with a cake dome or wrap loosely in plastic wrap. It keeps well for up to 2 days.
Refrigerator: Store in an airtight container or tightly covered. It stays fresh for up to 5 days. Pull individual slices out 15-20 minutes before eating so the frosting softens back up.
Freezer: Wrap individual slices in plastic wrap, then place in a freezer-safe bag. Freeze for up to 3 months. Thaw overnight in the fridge or at room temperature for a couple hours.
FAQ
Can I use natural cocoa powder instead of Dutch-process? You can, but the flavor will be slightly different. Dutch-process gives you a deeper, smoother chocolate flavor. Natural cocoa is a bit more acidic and lighter in color. Both will work, just know that the results won’t be identical.
My cake came out dense. What happened? A few things can cause this: overmixing the batter, cold ingredients, or old baking soda or baking powder. Make sure your leavening agents aren’t expired, and always use room temp ingredients.
Can I make this as cupcakes? Yes! Fill cupcake liners about ⅔ full and bake at 350°F for 18-22 minutes. This recipe makes about 24 cupcakes.
My frosting is too thick/thin. How do I fix it? Too thick: add heavy cream 1 tsp at a time and mix. Too thin: add powdered sugar 2 tbsp at a time and mix. Easy fixes.
Does this actually taste like coffee? No, it genuinely doesn’t. The coffee amplifies the chocolate. It’s one of those things that sounds weird until you taste the result and immediately understand why every good chocolate cake recipe uses it.
Can I make a 3-layer cake with this recipe? For 3 layers, I’d recommend making 1.5x the recipe and using three 8-inch pans. The baking time stays roughly the same, just check with a toothpick around the 28-minute mark.
Wrapping Up
Here’s the truth: a great chocolate cake is one of those things that sounds basic until you actually nail it. And when you do, it becomes the thing people request for every birthday, every celebration, every random Tuesday that calls for cake.
This recipe is genuinely one of those. The kind you’ll make once, adjust nothing, and keep going back to.
Give it a try this week and drop a comment below letting me know how it turned out! I love hearing how these go for people, and if you made any swaps or variations, share those too. Sometimes the tweaks are even better than the original.
Questions? Leave them below and I’ll get back to you. 🍫