I used to think lemon curd was one of those fancy things only professional bakers bothered with.
Turns out, I was completely wrong.
After making it for the first time last year, I realized lemon curd is one of those recipes that sounds complicated but is actually ridiculously simple. And the homemade version? So much better than anything you’ll find in a store.
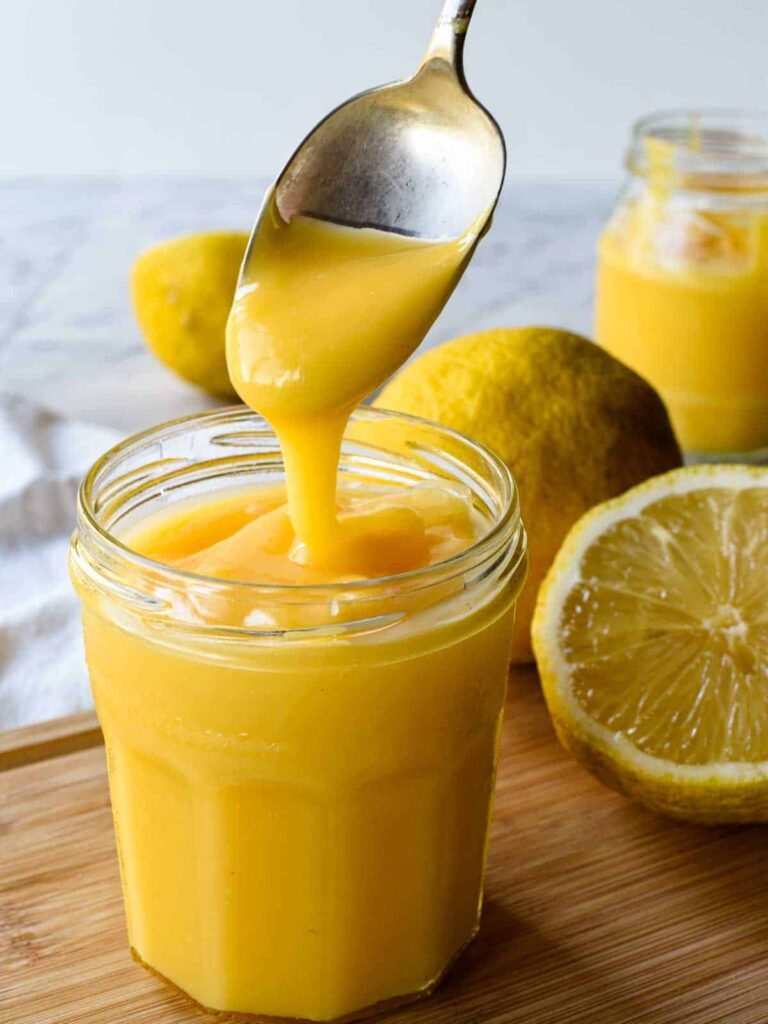
The texture is silky and thick, the flavor is bright and tangy with just the right amount of sweetness, and you can use it on basically everything. Toast, scones, cakes, tarts, yogurt, or straight from the jar with a spoon (no judgment here 🥄).
I’ve been making this recipe on repeat lately because it keeps for weeks in the fridge and honestly makes me feel like I have my life together when I can casually pull out homemade lemon curd for guests.
Let me show you exactly how to make it.
What You’ll Need
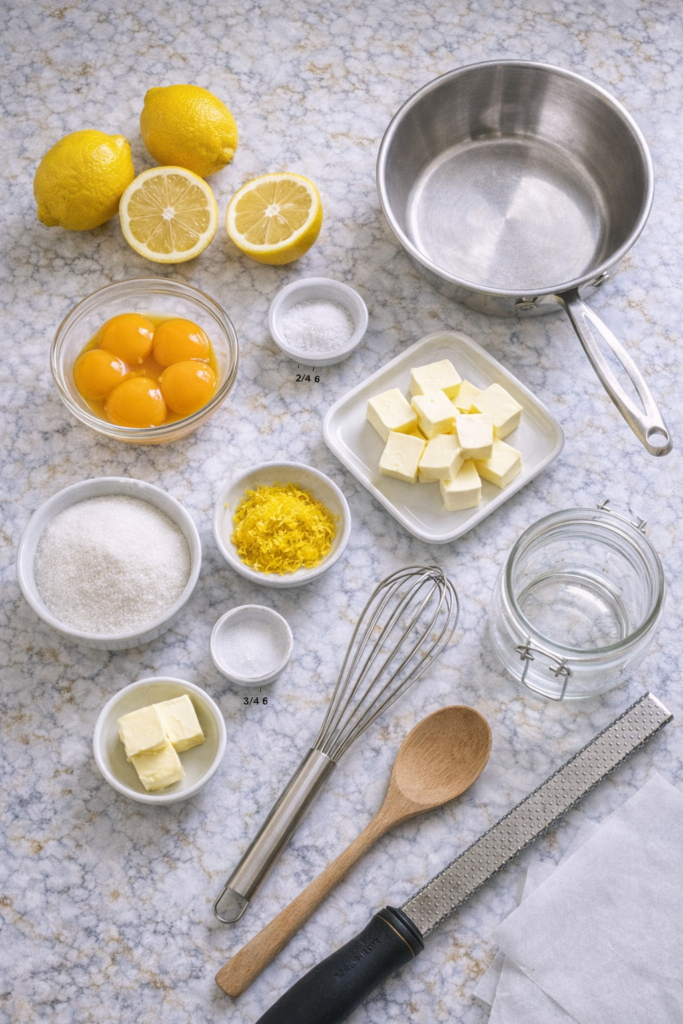
For the Lemon Curd:
- 4 large egg yolks
- 1/2 cup fresh lemon juice (about 3-4 lemons)
- 2 tablespoons lemon zest (from about 2 lemons)
- 3/4 cup granulated sugar
- 1/4 teaspoon salt
- 6 tablespoons unsalted butter, cut into small cubes
Tools:
- Medium saucepan
- Whisk
- Fine mesh strainer
- Heat-resistant spatula or wooden spoon
- Microplane or zester
- Citrus juicer (or just your hands)
- Glass jar or airtight container for storage
Pro Tips
Don’t skip the straining step. I learned this the hard way the first time I made lemon curd. Even if you think your mixture looks perfectly smooth, there will be tiny bits of cooked egg that you don’t want in your final product. Straining takes 30 seconds and makes a huge difference in texture.
Use fresh lemons only. Bottled lemon juice won’t give you the same bright, fresh flavor. The natural oils in fresh lemon zest are what make this recipe pop, so don’t skimp here.
Keep the heat low and be patient. The biggest mistake people make is cranking up the heat to speed things up. This will scramble your eggs and ruin everything. Low and slow is the way to go. It usually takes about 8-10 minutes of constant stirring, but trust me, it’s worth it.
Temperature matters for butter. Make sure your butter is cold when you add it. This helps the curd thicken properly and creates that luxurious, smooth texture you’re after.
Test for doneness with the spoon test. Your curd is ready when it coats the back of a spoon and holds a line when you draw your finger through it. It will also thicken more as it cools, so don’t worry if it seems slightly loose.
Substitutions and Variations
Egg substitution: You can’t really substitute the egg yolks here. They’re what make lemon curd thick and creamy. Vegan alternatives exist, but they’re completely different recipes.
Sugar options: You can use superfine sugar if you want faster dissolution, but regular granulated works perfectly fine. Some people like using a mix of white and brown sugar for a deeper flavor.
Citrus swaps: This method works for other citrus fruits too. Try lime curd, orange curd, or even grapefruit curd. Just keep the juice and zest measurements the same.
Butter alternatives: If you need dairy-free, you can use vegan butter, but the flavor will be slightly different.
Flavor additions: Add a vanilla bean (split and scraped) for vanilla lemon curd, or a tablespoon of lavender buds (strained out later) for lavender lemon curd. Fresh herbs like basil or thyme also work surprisingly well.
How to Make Lemon Curd
Step 1: Prep your lemons
Start by zesting your lemons before you juice them (way easier this way). You’ll need about 2 tablespoons of zest. Then juice enough lemons to get 1/2 cup of fresh juice.
I like to strain the lemon juice through a small sieve to catch any seeds or pulp, but this is optional.
Step 2: Combine the base ingredients
In your medium saucepan, whisk together the egg yolks, lemon juice, lemon zest, sugar, and salt until everything is well combined. The mixture will be pale yellow and slightly foamy.
Step 3: Cook the mixture
Place your saucepan over medium-low heat. This is where patience comes in.
Stir constantly with your whisk or wooden spoon. You need to keep everything moving so the eggs don’t cook unevenly or scramble.
After about 5-7 minutes, you’ll notice the mixture starting to thicken. Keep stirring.
Around the 8-10 minute mark, the curd should be thick enough to coat the back of your spoon. When you run your finger through it, the line should stay clean and not run back together.
Step 4: Add the butter
Remove the pan from heat. Add your cold butter cubes all at once.
Whisk until the butter is completely melted and incorporated. The mixture will become glossy and even thicker.
Step 5: Strain the curd
Pour the lemon curd through a fine mesh strainer into a clean bowl. Use a spatula to push it through if needed.
This removes any cooked egg bits or zest pieces that might affect the smooth texture.
Step 6: Cool and store
Press plastic wrap directly onto the surface of the lemon curd (this prevents a skin from forming) and let it cool to room temperature.
Once cool, transfer to a clean glass jar or airtight container.
Refrigerate for at least 2 hours before using. It will thicken even more as it chills.
Leftovers and Storage
Store your lemon curd in the fridge in an airtight container or jar. It will keep for 2-3 weeks, though mine never lasts that long.
You can also freeze lemon curd for up to 3 months. Just thaw it overnight in the fridge before using.
If you notice any separation when you take it out of the fridge, just give it a good stir and it will come back together.
The texture stays silky and spreadable straight from the fridge, which is one of the things I love about it.
Ways to Use Your Lemon Curd
Now that you have this gorgeous jar of lemon curd, here’s what you can do with it:
Spread it on toast, croissants, or English muffins for breakfast. Layer it in parfaits with yogurt and granola. Use it as a filling for cakes, cupcakes, or tarts. Swirl it into cheesecake batter before baking. Mix it into whipped cream for an easy lemon mousse. Spread it between layer cakes. Top your pancakes or waffles with it instead of syrup. Stir a spoonful into your tea for a fancy treat. Use it as a filling for thumbprint cookies. Spread it on scones (this is my personal favorite).
You can also just eat it straight from the jar. I won’t tell anyone.
FAQ
Why did my lemon curd turn out grainy?
This usually happens if the heat was too high and the eggs started to scramble. The key is keeping your heat low and stirring constantly. If it does happen, you can try blending it smooth with an immersion blender.
Can I make this ahead of time?
Yes! This is actually a great make-ahead recipe. It keeps in the fridge for 2-3 weeks, so you can make it whenever you have time and use it throughout the week.
My lemon curd is too thin. What went wrong?
It might not have cooked long enough. Remember, it will thicken as it cools, but if it’s still runny after refrigerating, you can gently reheat it and cook it a bit longer until it reaches the right consistency.
Can I double this recipe?
Absolutely. Just make sure you use a larger saucepan so you have plenty of room to stir without it bubbling over.
Do I have to use a strainer?
Technically no, but I really recommend it. It only takes a few seconds and makes such a difference in getting that perfectly smooth, professional texture.
Can I use bottled lemon juice?
I really don’t recommend it. Fresh lemon juice and zest give this recipe its bright, fresh flavor. Bottled juice tastes flat and won’t give you the same results.
Is lemon curd the same as lemon custard?
They’re similar but not identical. Lemon curd is more concentrated and tangy, while custard is usually milder and served as a dessert on its own.
Wrapping Up
Making lemon curd from scratch is one of those small kitchen wins that makes you feel like a total rockstar.
It’s way easier than you think, uses ingredients you probably already have, and the result is so much better than anything you can buy at the store.
Plus, having a jar of homemade lemon curd in your fridge just makes life better. Trust me on this one.
Try making a batch this week and let me know what you think in the comments below. I’d love to hear what you end up using it for or if you tried any of the flavor variations!