You know that moment when you walk into an Indian restaurant and the smell of biryani hits you like a warm hug? That’s what we’re making today.
Real talk: biryani intimidates people. They see the long ingredient list and assume it’s some complicated thing only restaurant chefs can pull off.
But here’s what nobody tells you: biryani is just layered rice and chicken. That’s it. The magic comes from the spices and the way everything steams together.
I’m not gonna lie and say this is a 20-minute weeknight dinner. It’s not. But it’s also not as hard as you think, and the payoff? Absolutely worth it.
Your kitchen will smell incredible. Your family will think you’ve been hiding some secret cooking talent. And you’ll have leftovers that taste even better the next day (seriously, biryani is one of those rare dishes that gets better with time).
So grab your biggest pot and let’s make some magic happen.
What You’ll Need
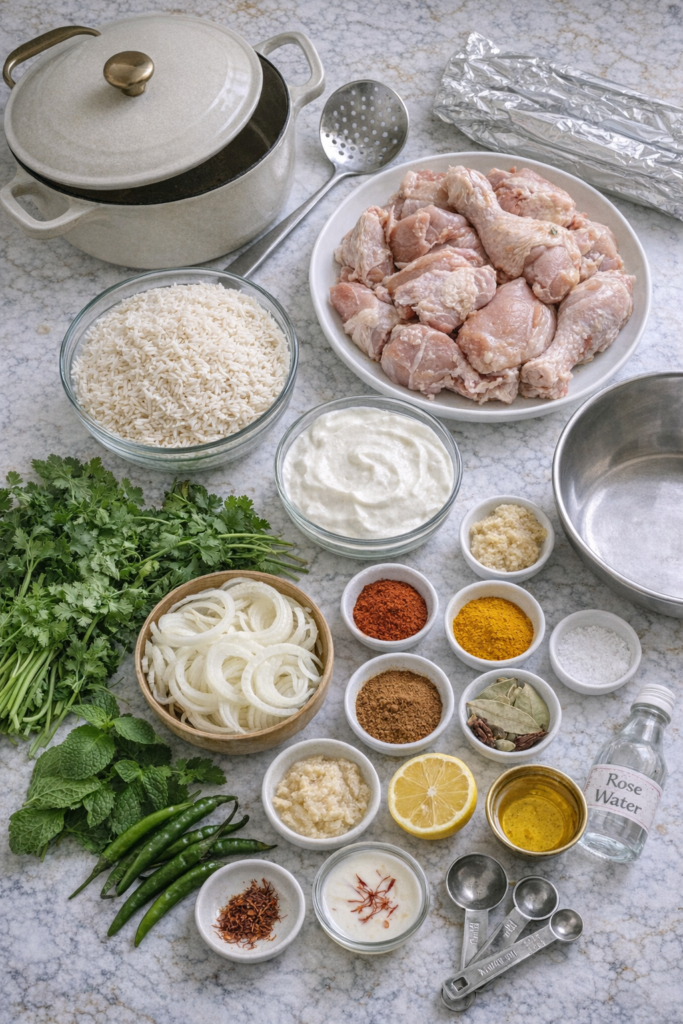
For the Chicken Marinade:
- 2 lbs chicken (thighs or drumsticks work best, cut into pieces)
- 1 cup plain yogurt
- 2 tablespoons ginger-garlic paste
- 1 teaspoon red chili powder
- ½ teaspoon turmeric powder
- 1 teaspoon garam masala
- Salt to taste (about 1 teaspoon)
- 2 tablespoons lemon juice
For the Rice:
- 2 cups basmati rice
- 4 cups water
- 2 bay leaves
- 4-5 green cardamom pods
- 4-5 cloves
- 1 cinnamon stick
- 1 tablespoon salt
For the Biryani Layers:
- 3 large onions (thinly sliced)
- ½ cup oil or ghee (ghee gives better flavor)
- 1 cup fresh cilantro (chopped)
- ½ cup fresh mint leaves (chopped)
- 4-5 green chilies (slit lengthwise)
- ½ cup milk
- A pinch of saffron strands (or ½ teaspoon turmeric mixed with milk)
- 2 tablespoons rose water or kewra water (optional but adds that restaurant touch)
Tools You’ll Need:
- Large heavy-bottomed pot with a tight-fitting lid (Dutch oven works great)
- Large mixing bowl for marinating
- Another large pot for parboiling rice
- Slotted spoon
- Aluminum foil (for sealing the pot)
- Small bowl for saffron milk
Pro Tips
Marinate overnight if you can. I know the recipe says 30 minutes minimum, but if you plan ahead and marinate your chicken the night before, the flavors go so much deeper. The yogurt tenderizes the meat while the spices really sink in.
Don’t skip the fried onions. Yeah, standing over hot oil frying onions isn’t glamorous. But those crispy, golden brown onions are what give biryani that signature sweetness and texture. Make extra because you’ll want to snack on them (and save some for garnish).
The rice should be 70% cooked, not fully done. This is where most people mess up. When you parboil the rice, it should still have a slight bite to it. It’ll finish cooking when you layer everything together and let it steam. Overcooked rice at this stage = mushy biryani. Nobody wants that.
Seal it tight. When you put that pot on the stove for the final steam, you want zero steam escaping. Cover the lid with aluminum foil or a clean kitchen towel, then press it down tight. This is called “dum” and it’s the secret to fluffy, perfectly cooked biryani.
Let it rest. I know it’s hard when your kitchen smells like heaven, but give your biryani 5-10 minutes to rest after you turn off the heat. This helps all those layers settle and makes it easier to serve without everything falling apart.
How to Make Chicken Biryani
Step 1: Get Your Chicken Ready
Mix the yogurt, ginger-garlic paste, red chili powder, turmeric, garam masala, salt, and lemon juice in a large bowl.
Toss in your chicken pieces and make sure every piece is completely coated. Cover and stick it in the fridge for at least 30 minutes (but again, overnight is better).
Step 2: Make Those Crispy Onions
Heat the oil or ghee in your pot over medium-high heat.
Throw in those sliced onions and fry them until they’re golden brown and crispy. This takes about 15-20 minutes. Don’t rush it by cranking up the heat or they’ll burn.
Use a slotted spoon to take them out and put them on a paper towel-lined plate. Set aside half for layering and keep half for garnish later.
Step 3: Cook the Chicken
In the same pot with the leftover oil (you should have about 2-3 tablespoons left, add a bit more if needed), add your marinated chicken.
Cook on medium-high heat for about 10 minutes, stirring occasionally. The chicken doesn’t need to be fully cooked through because it’ll finish cooking with the rice later.
You just want some color on it and for the marinade to thicken up a bit.
Step 4: Parboil the Rice
While your chicken is doing its thing, bring 4 cups of water to a boil in another pot.
Add the bay leaves, cardamom, cloves, cinnamon stick, and salt.
Rinse your rice under cold water until the water runs clear (this removes excess starch and keeps your rice fluffy).
Add the rice to the boiling water and cook for about 5-7 minutes. The rice should be 70% done (it should still have a little firmness when you bite into it).
Drain immediately and set aside.
Step 5: Layer Everything
This is where it gets fun.
Spread half of your partially cooked chicken at the bottom of the pot.
Sprinkle half of the cilantro, mint, green chilies, and fried onions on top.
Layer half of the parboiled rice over everything.
Repeat with the remaining chicken, herbs, and rice.
Mix the saffron (or turmeric) with the warm milk and drizzle it all over the top layer of rice. Add the rose water or kewra water if you’re using it.
Dot the top with a tablespoon of ghee or butter (this keeps the top layer from drying out).
Step 6: The Dum (Steaming) Process
Cover your pot with aluminum foil, then put the lid on top. You want it really tight.
Put the pot on high heat for 3-4 minutes until you see steam trying to escape.
Lower the heat to the absolute lowest setting your stove has and let it cook for 25-30 minutes.
Turn off the heat and let it sit for another 5-10 minutes. Don’t peek! Seriously, keep that lid on.
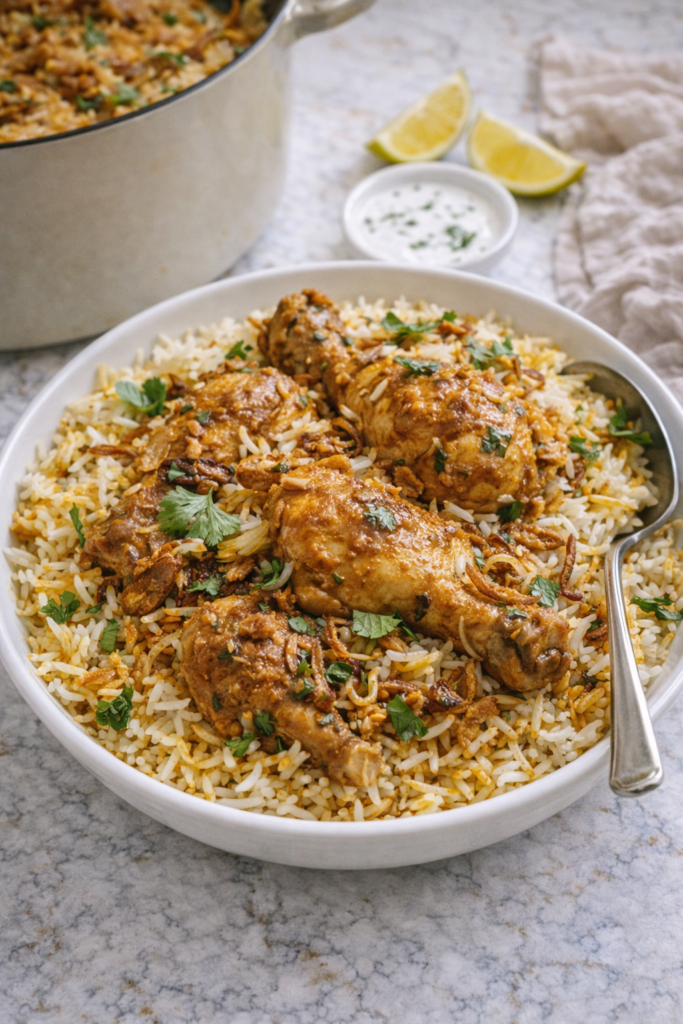
Step 7: Serve It Up
When you finally open that lid, you’ll see the most beautiful layers of golden rice.
Use a large spoon or spatula and gently fluff the biryani from the bottom up, mixing all those layers together.
Top with the reserved crispy onions, some extra cilantro, and maybe a few boiled eggs if you’re feeling fancy.
Substitutions and Variations
No saffron? Use a tiny bit of turmeric mixed with milk for that yellow color. It’s not the same flavor-wise, but it works.
Want it vegetarian? Replace the chicken with paneer, potatoes, mixed vegetables, or chickpeas. Everything else stays the same.
Can’t find basmati rice? You can use jasmine rice, but basmati is really what makes biryani special. It’s longer, fluffier, and has that nutty flavor.
Make it spicier. Add more green chilies or increase the red chili powder in the marinade. You could also add some chopped Thai chilies when layering.
Bone-in vs boneless. Bone-in chicken (thighs and drumsticks) gives you more flavor, but boneless chicken cooks faster and is easier to eat. Your call.
Swap the proteins. Lamb, goat, shrimp, or even fish work great in biryani. Just adjust the cooking time based on what you’re using.
Make Ahead Tips
Marinate your chicken up to 24 hours in advance. The longer it sits, the better it tastes.
You can fry the onions a day ahead too. Just store them in an airtight container at room temperature and they’ll stay crispy.
The assembled biryani can sit in the fridge for up to 2 days before you cook it. Just bring it to room temperature for 30 minutes before doing the final steaming step.
Leftovers and Storage
Store leftover biryani in an airtight container in the fridge for up to 4 days.
To reheat, sprinkle a little water over it and microwave covered for 2-3 minutes, or warm it in a pot on low heat with a splash of water.
Biryani freezes really well. Put it in freezer-safe containers and it’ll keep for up to 3 months. Thaw overnight in the fridge before reheating.
Pro tip: leftover biryani makes an incredible fried rice. Just toss it in a pan with some eggs and veggies.
What to Serve With Chicken Biryani
Biryani is pretty much a complete meal on its own, but these sides take it to the next level:
Raita (yogurt with cucumber, onions, and tomatoes) – this cools down the spice and adds a fresh crunch
Shorba (thin lentil soup) – light and comforting
Kachumber salad – basically diced cucumbers, tomatoes, and onions with lemon juice
Papad or papdum – those crispy lentil wafers you can fry or roast
Pickle (any kind of Indian pickle, or even a simple onion pickle)
FAQ
Can I use brown rice instead of basmati?
You can, but the texture and cooking time will be different. Brown rice takes longer to cook, so you’d need to parboil it longer (about 15-20 minutes instead of 5-7). The final result won’t be as fluffy or aromatic.
Why is my biryani mushy?
Either your rice was overcooked during the parboiling stage, or you added too much water/moisture. Remember: 70% done max for the rice, and don’t go overboard with the liquid.
Can I make this in a rice cooker?
Not really. Biryani needs that layering and steaming method (dum) that a rice cooker can’t do. You need a heavy pot with a tight lid.
How do I know when the biryani is done?
When you open the lid after steaming, the rice should be fully cooked, fluffy, and separate. The chicken should be tender and falling off the bone. If the rice is still hard, put the lid back on and steam for another 5-10 minutes.
Is biryani supposed to be dry or wet?
It should be somewhere in the middle. The rice should be moist but not swimming in liquid. Each grain should be separate and coated with flavor.
Can I skip the saffron/turmeric milk?
You can, but it won’t have that signature golden color on top. Plus, saffron adds a subtle flavor that makes biryani taste more restaurant-quality.
What’s the difference between biryani and pulao?
Biryani is layered and cooked using the dum method. Pulao is when everything (rice, meat, spices) is cooked together in one go. Biryani has more distinct layers and stronger flavors.
Nutritional Information (Per Serving – Makes 6 Servings)
- Calories: 520
- Protein: 32g
- Carbohydrates: 58g
- Fat: 16g
- Fiber: 2g
- Sodium: 680mg
These are approximate values and will vary based on specific ingredients and portion sizes.
Wrapping Up
Making biryani at home is one of those things that sounds way harder than it actually is.
Yeah, there are steps. Yeah, there’s some waiting around. But once you’ve done it a couple times, it becomes second nature.
And honestly? Nothing beats pulling that lid off after 30 minutes and seeing perfectly steamed, fragrant biryani looking back at you.
The smell alone is worth the effort. The taste? Next level.
So go make some biryani this weekend. Take your time with it. Enjoy the process. And when you’re done, come back here and tell me how it went.
Did your kitchen smell amazing? Did your family ask for seconds? Any questions or things you’d do differently next time? Drop a comment below – I wanna hear all about it! 👇