
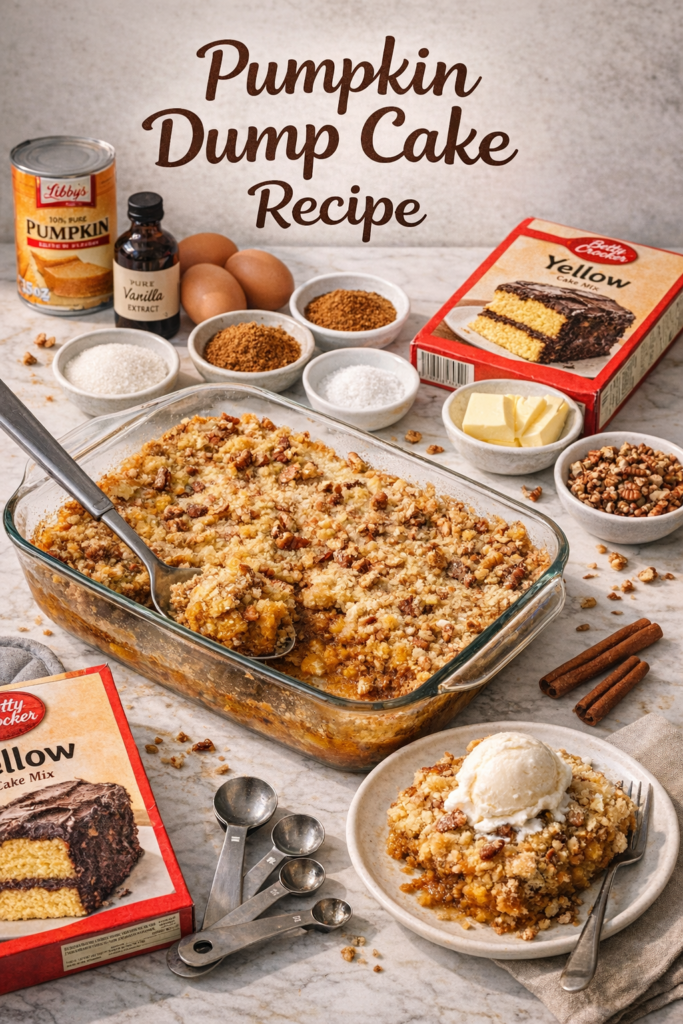
You’ve heard of dump cakes. But pumpkin dump cake? That’s a different level.
It has the cozy, spiced filling of a pumpkin pie and the buttery, golden crumble of a crisp on top. And the whole thing comes together with zero mixing, zero fuss, and ingredients you probably already have.
This is the kind of dessert that makes people ask, “You made this from scratch?!” And you just smile and nod. 😏
Fair warning: once you make this, every fall gathering will come with requests for it.
What’s Actually in a Pumpkin Dump Cake?
Here’s where people get surprised.
A dump cake is called that because you literally dump the ingredients into the pan. No creaming butter. No folding. No technique required.
The result? A dessert with a creamy, custardy pumpkin base and a crispy, caramelized topping from the dry cake mix and melted butter. It somehow manages to be soft AND crunchy at the same time.
The secret ingredient that makes it work: a box of yellow cake mix. It soaks up the butter during baking and turns into this incredible golden crust that you’ll be picking at with a spoon straight from the pan.
What You’ll Need
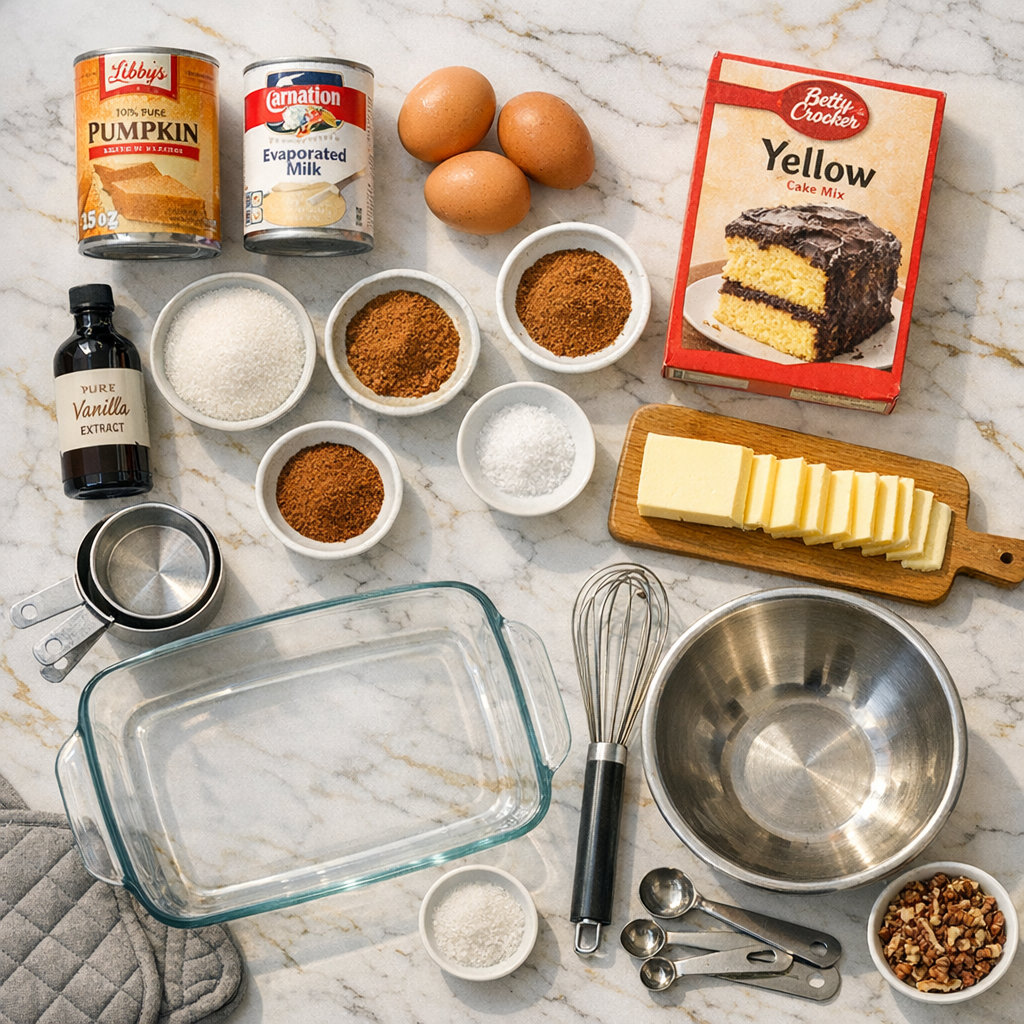
For the Pumpkin Layer:
- 1 can (15 oz) pure pumpkin puree (not pumpkin pie filling)
- 1 can (12 oz) evaporated milk
- 3 large eggs
- 1 cup granulated sugar
- 2 teaspoons pumpkin pie spice
- 1 teaspoon ground cinnamon
- ½ teaspoon salt
- 1 teaspoon vanilla extract
For the Cake Layer:
- 1 box (15.25 oz) yellow cake mix (dry, straight from the box)
- 1 cup (2 sticks / 227g) unsalted butter, thinly sliced or melted
- ½ cup chopped pecans or walnuts (optional, but highly recommended)
To Serve:
- Whipped cream or vanilla ice cream
Tools You’ll Need
- 9×13-inch baking dish (glass or metal)
- Large mixing bowl
- Whisk
- Measuring cups and spoons
- Knife and cutting board (for slicing butter)
- Oven mitts
Pro Tips
These are the things that’ll take your dump cake from good to really good.
- Use pure pumpkin, not pie filling. Pumpkin pie filling already has sugar and spices added. If you use that, your pumpkin layer will be overwhelmingly sweet and the spice balance will be off.
- Slice the butter thin and cover every inch of the cake mix. This is the #1 thing most first-timers get wrong. If there are dry patches of cake mix with no butter on top, they’ll stay powdery after baking. Cover everything.
- Don’t stir. I know it’ll be tempting. The whole thing will look like it can’t possibly bake into something cohesive. Trust the process and leave it alone.
- Let it cool for at least 20 minutes before cutting. The pumpkin layer needs time to set, otherwise you’ll have a runny, soupy mess (still delicious, but not exactly presentable).
- Add the nuts halfway through baking if you want them toasty but not burnt. Pecans especially can get too dark if they’re in from the start.
Substitutions and Variations
Cake mix swaps:
- Spice cake mix instead of yellow = an even deeper fall flavor
- White cake mix = lighter, more delicate topping
- Butter pecan cake mix = honestly incredible
Butter options:
- Salted butter works fine, just skip the added salt in the pumpkin layer
- Dairy-free butter like Earth Balance works for a dairy-free version
Sugar swaps:
- Brown sugar instead of granulated gives a slight molasses note to the pumpkin layer
- Coconut sugar works too, though the filling will be slightly less sweet
Nut-free version: Just skip the pecans entirely. The topping is just as good without them.
Chocolate lover’s version: Swap yellow cake mix for devil’s food cake mix. Pumpkin + chocolate is genuinely underrated.
Make-Ahead Tips
This cake is actually better the next day.
The pumpkin layer firms up overnight in the fridge, and all the flavors have more time to develop. You can bake it the night before, cover it loosely with foil, and refrigerate it until you need it.
To reheat: pop individual servings in the microwave for 20-30 seconds, or warm the whole dish in a 300°F (150°C) oven for about 15 minutes.
Nutritional Info (Per Serving, Approximate)
Based on 12 servings, without toppings
| Nutrient | Amount |
|---|---|
| Calories | ~380 |
| Total Fat | 18g |
| Saturated Fat | 10g |
| Carbohydrates | 51g |
| Sugar | 33g |
| Protein | 5g |
| Fiber | 1g |
| Sodium | 420mg |
For a lighter version: Use a sugar-free cake mix, reduce butter to ¾ cup, and swap evaporated milk for evaporated skim milk. Cuts calories down to roughly 280 per serving.
Meal Pairing Suggestions
This pairs perfectly with:
- Hot apple cider (classic for a reason)
- A scoop of vanilla or cinnamon ice cream on top while it’s still warm
- Strong black coffee to balance the sweetness
- Chai latte if you want to lean all the way into the fall vibes
It also works beautifully as a Thanksgiving dessert alongside pumpkin pie for people who want something different but still familiar.
How to Make Pumpkin Dump Cake
Step 1: Preheat and Prep
Preheat your oven to 350°F (175°C).
Lightly grease your 9×13-inch baking dish with butter or non-stick spray.
Step 2: Make the Pumpkin Layer
In a large bowl, whisk together the pumpkin puree, evaporated milk, eggs, sugar, pumpkin pie spice, cinnamon, salt, and vanilla extract until smooth and well combined.
Pour it into the greased baking dish and spread it into an even layer.
Step 3: Add the Cake Mix
Open the box of yellow cake mix and sprinkle it evenly over the top of the pumpkin layer. Do not stir. Do not press it down.
If you’re adding nuts, sprinkle them over the dry cake mix now.
Step 4: Add the Butter
This step is everything.
Lay thin slices of butter across the entire surface of the cake mix, covering as much area as possible. You want every bit of that dry mix to get touched by butter so it bakes up golden and crisp.
If you prefer, you can melt the butter and drizzle it over the top instead. Both work well.
Step 5: Bake
Bake for 50-60 minutes, until the topping is golden brown and the pumpkin layer is set around the edges.
You’ll know it’s done when the center barely jiggles when you gently shake the pan, similar to a cheesecake.
Step 6: Cool and Serve
Let it cool for at least 20 minutes before serving.
Scoop into bowls and top with whipped cream or a big scoop of vanilla ice cream. Eat immediately. Regret nothing.
Leftovers and Storage
Refrigerator: Cover the baking dish with plastic wrap or foil and store for up to 5 days. The topping softens a bit but it’s still really good.
Freezer: Cut into individual portions, wrap each one tightly in plastic wrap, then place in a zip-lock freezer bag. Freeze for up to 2 months.
To thaw: place in the fridge overnight, then reheat in the microwave for 30-45 seconds.
One thing to note: the crispy topping does soften the longer it sits, especially in the fridge. If you love the crunch, reheat it in the oven at 325°F for 10 minutes to get some of that texture back.
FAQ
Can I use fresh pumpkin instead of canned? You can, but it’s a lot more work for very little difference. If you do use fresh, make sure to cook and puree it until very smooth and drain out as much moisture as possible. Watery pumpkin puree will give you a soggy bottom layer.
My cake mix topping still looks powdery after baking. What happened? You didn’t have enough butter coverage. Next time, make sure every inch of the cake mix has a pat of butter over it. You can also fix it mid-bake by carefully drizzling a little more melted butter over the dry spots.
Can I make this in a smaller dish? An 8×8 or 9×9-inch dish works if you halve the recipe. Baking time will be similar, maybe 5-10 minutes less, so start checking at 45 minutes.
Is this the same as pumpkin pie? Not quite. The pumpkin layer is similar in flavor to pumpkin pie filling, but the texture is softer and more custardy. The big difference is the cake mix topping, which gives you that crunchy, buttery contrast you don’t get with traditional pie.
Can I make this gluten-free? Yes! Just use a gluten-free yellow cake mix (King Arthur and Bob’s Red Mill both have great options). Everything else in the recipe is already gluten-free.
Do I need to refrigerate it? Yes. Because of the eggs and evaporated milk in the pumpkin layer, it should be refrigerated after it cools. Don’t leave it out at room temperature for more than 2 hours.
Wrapping Up
If fall had a dessert that captured everything good about the season, this pumpkin dump cake would be it.
It’s cozy and simple and the kind of thing that makes your whole house smell incredible while it bakes. And the fact that it takes 10 minutes to throw together? That just makes it even better.
Give it a go this week, and then come back and drop a comment below. Tell me how it went, what swaps you made, or what your family thought when they had their first bite. I always love hearing from you, and if you have any questions, ask away!