You slice into it. Warm chocolate pours out like lava. And suddenly everyone at the table is completely silent.
That’s the lava cake effect. And it’s something you can pull off in your own kitchen tonight, in under 30 minutes, with ingredients you probably already have.
No pastry degree needed. No fancy equipment. Just a really good dessert that looks like it took all day.
Stick around, because there’s a trick at the end that most recipes skip, and it makes all the difference between a cake that flows and one that just… doesn’t.
What You’ll Need
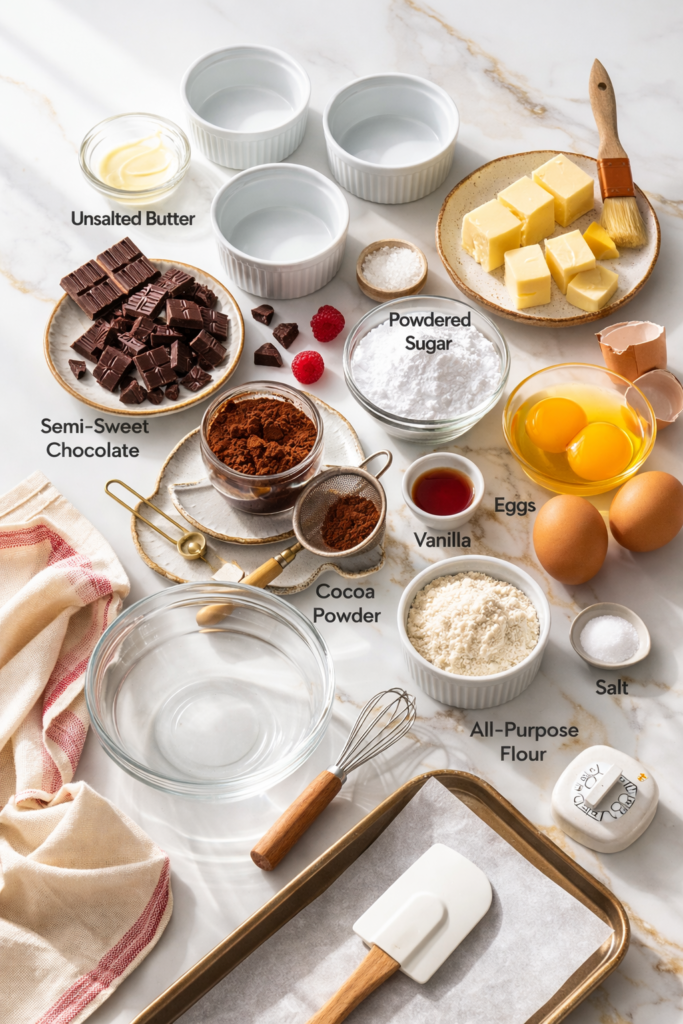
For the cakes (makes 4 ramekins):
- 4 oz (113g) semi-sweet or bittersweet chocolate (60-70% cacao), roughly chopped
- 1/2 cup (113g) unsalted butter, cut into cubes, plus extra for greasing
- 1 cup (120g) powdered sugar, sifted
- 2 large whole eggs
- 2 large egg yolks
- 1 tsp pure vanilla extract
- 6 tbsp (45g) all-purpose flour
- 1/4 tsp fine sea salt
- Cocoa powder (for dusting the ramekins)
Optional toppings:
- Vanilla bean ice cream
- Fresh raspberries or strawberries
- A light dusting of powdered sugar
- Flaky sea salt
Tools You’ll Need
- 4 ramekins (6 oz each)
- Medium heatproof bowl
- Small saucepan (for the double boiler method)
- Electric hand mixer or whisk
- Rubber spatula
- Baking sheet
- Small fine mesh sieve (for dusting cocoa powder)
- Kitchen timer (non-negotiable)
Pro Tips
These are the things that actually matter when making lava cake for the first time.
1. Use good chocolate. This dessert has almost nowhere to hide, so the chocolate is everything. Go for a bar (not chips), ideally 60-70% cacao. Chips contain stabilizers that mess with the texture and melt unevenly.
2. The ramekin prep is more important than you think. Butter every corner generously, then dust with cocoa powder (not flour, cocoa keeps it chocolate-forward). Tap out the excess. A well-prepped ramekin is the difference between a cake that releases cleanly and one that sticks and breaks apart on the plate.
3. Don’t overbake. Seriously. The center should look slightly underdone when you pull it out. If it looks fully set, you’ve already gone too far. Every oven runs differently, so start checking at the 10-minute mark.
4. Let it rest for exactly 1 minute after baking. Pull it from the oven, let it sit for one minute on the counter, then flip. This tiny rest helps the cake pull away from the sides and makes unmolding much cleaner.
5. Do a test run. If you’re making these for a special occasion or dinner guests, bake one ramekin as a test first. It’s the smartest thing you can do, and you get a snack in the process.
How to Make Chocolate Lava Cakes
Step 1: Prep Your Ramekins
Preheat your oven to 425°F (220°C).
Generously butter the inside of each ramekin, getting into every curve and edge. Then add a small spoonful of cocoa powder to each one, tilt and rotate to coat the sides and bottom evenly, and tap out any excess. Set them on a baking sheet and refrigerate while you make the batter.
Step 2: Melt the Chocolate and Butter
Set a heatproof bowl over a saucepan with about 1 inch of barely simmering water (this is your double boiler). Make sure the bowl doesn’t touch the water.
Add the chopped chocolate and butter to the bowl. Stir gently as they melt together until completely smooth and glossy. Remove from heat and let it cool for 2-3 minutes.
Don’t have a double boiler setup? Melt in the microwave in 20-second intervals, stirring between each one. Stop as soon as it’s melted.
Step 3: Mix the Batter
Whisk the powdered sugar into the melted chocolate mixture until combined.
Add the eggs and egg yolks, one at a time, whisking well after each addition. Stir in the vanilla extract.
Gently fold in the flour and salt with a spatula until just combined. Don’t overmix. The batter should be thick, smooth, and glossy.
Step 4: Fill the Ramekins
Divide the batter evenly among the 4 prepared ramekins, filling each about 3/4 of the way.
At this point, you can refrigerate them for up to 24 hours if you’re planning ahead. Just add 2-3 minutes to the bake time when baking straight from the fridge.
Step 5: Bake
Bake at 425°F (220°C) for 11-13 minutes.
You’re looking for: edges that are fully set, a center that puffs up slightly but still looks soft and underdone when you press it gently. That soft center is exactly what you want.
Step 6: Unmold and Serve Immediately
Remove from the oven. Let sit for exactly 1 minute.
Run a butter knife gently around the inside edge of each ramekin. Place your serving plate directly on top of the ramekin, press down lightly, and flip in one confident motion.
Wait 10 seconds, then slowly lift the ramekin off. The cake should release cleanly.
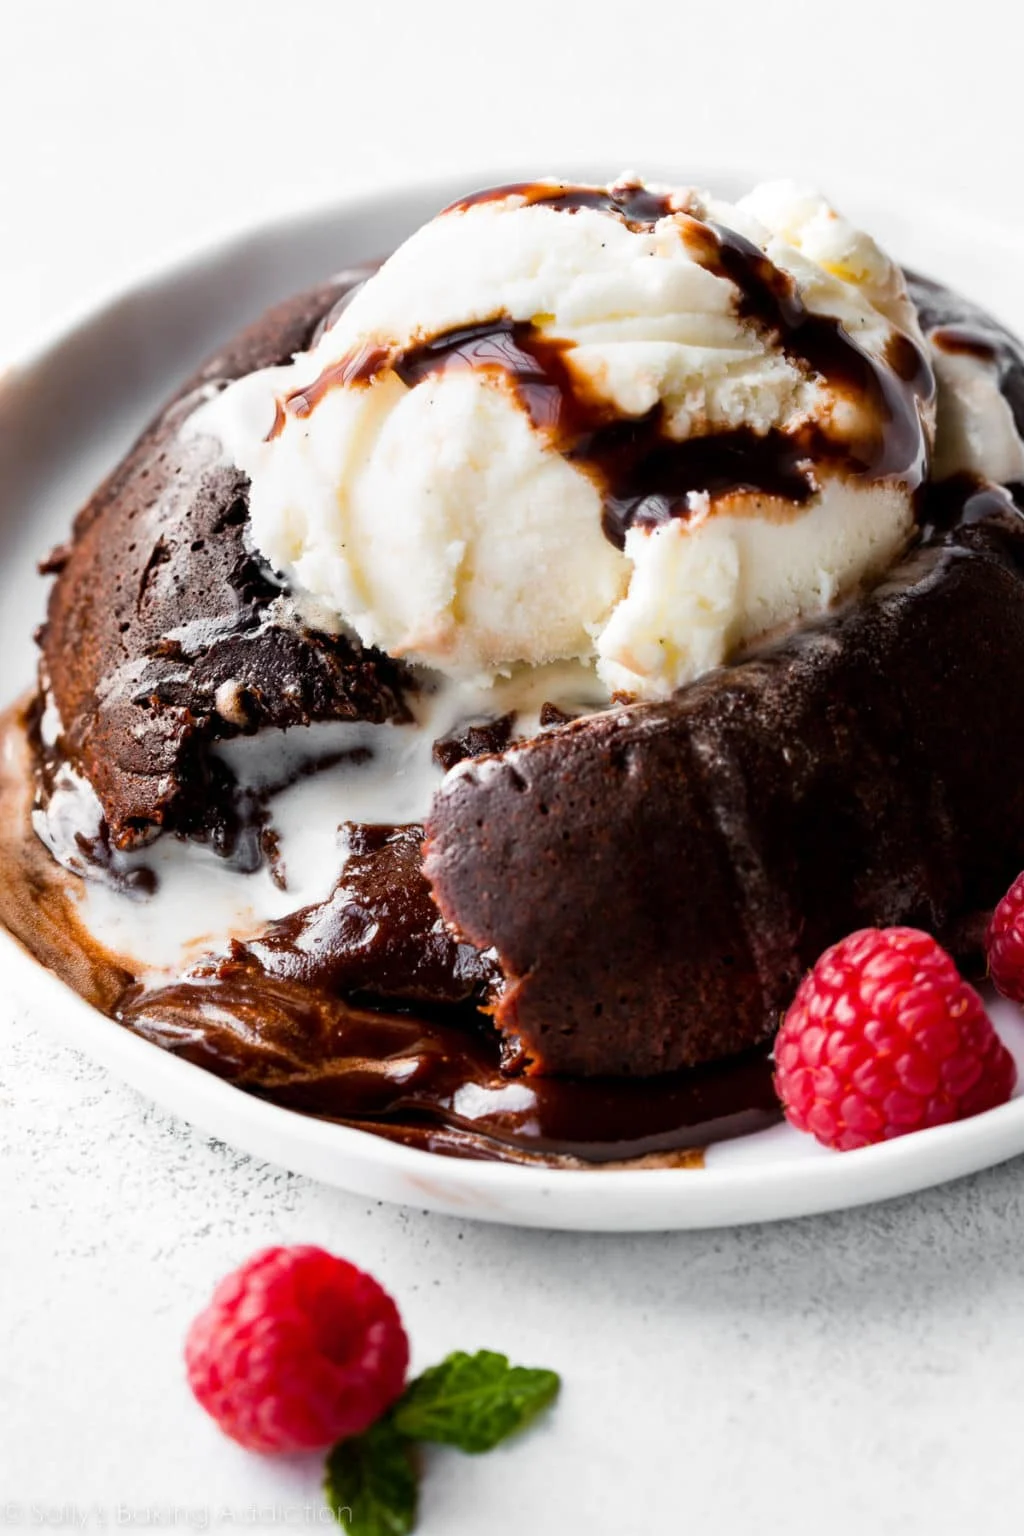
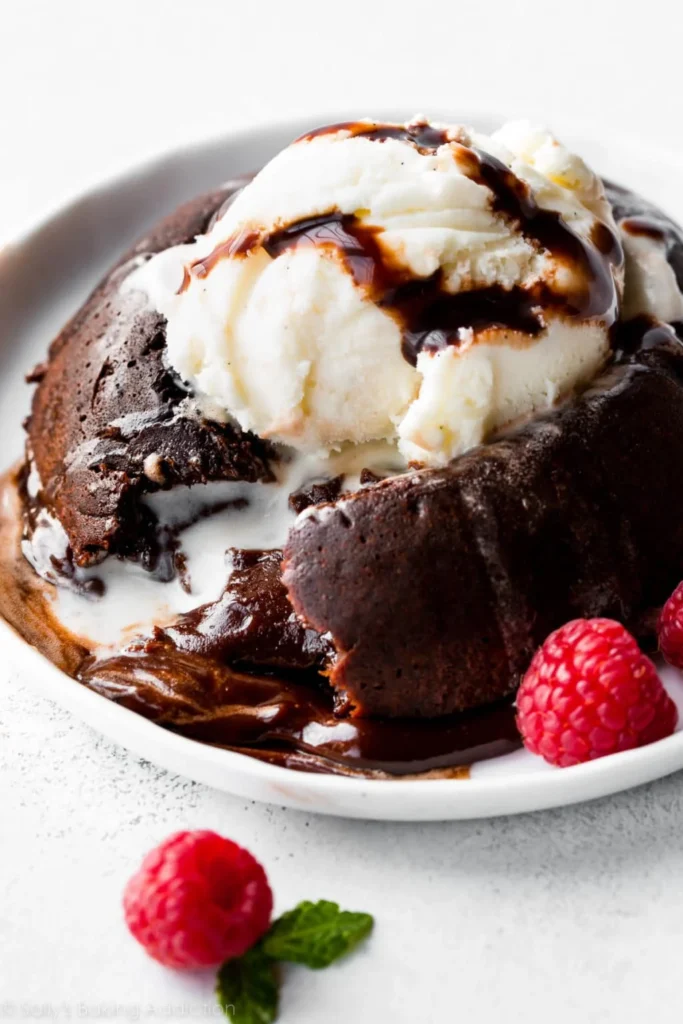
Serve immediately with vanilla ice cream, a few fresh raspberries, and a pinch of flaky sea salt if you want to take it up a notch.
Substitutions and Variations
Dairy-free version: Swap butter for vegan butter (like Miyoko’s) and use dairy-free dark chocolate. The results are really close to the original.
Gluten-free: Sub the all-purpose flour with a 1:1 gluten-free flour blend. Works well without any other changes.
No ramekins? Use a standard muffin tin, but reduce the baking time to 8-10 minutes and grease very well.
Want a flavored center? Push a frozen Nutella ball, a piece of caramel, or a raspberry into the center of each ramekin before baking for a fun surprise inside.
Espresso lava cake: Add 1 tsp of instant espresso powder to the chocolate mixture when melting. It deepens the chocolate flavor without making it taste like coffee.
Make-Ahead Tips
Lava cakes are actually great for entertaining because you can do all the prep in advance.
- Mix the batter and fill the ramekins up to 24 hours ahead
- Cover with plastic wrap and refrigerate
- When guests arrive, pop them in the oven (straight from the fridge), adding 2 extra minutes to the bake time
- You’ll look like you spent the entire day cooking when really you prepped a day ago
Nutritional Info (Per Serving)
| Per Cake | |
|---|---|
| Calories | ~450 kcal |
| Fat | 28g |
| Saturated Fat | 16g |
| Carbohydrates | 48g |
| Sugar | 38g |
| Protein | 7g |
| Fiber | 2g |
Note: Values are estimates and will vary based on the specific chocolate and butter used.
Ingredient swaps for different diets:
| Swap | Works For |
|---|---|
| Vegan butter + dairy-free chocolate | Dairy-free, vegan |
| GF 1:1 flour blend | Gluten-free |
| Monk fruit powdered sweetener | Lower sugar (texture may vary slightly) |
| Coconut sugar + extra egg yolk | Refined sugar-free |
Meal pairings: These work really well after a lighter dinner. Think pasta, grilled chicken, or a big salad. You want the dessert to be the main event, and it will be.
Leftovers and Storage
Let’s be real, these are best the moment they come out of the oven. That’s when the magic happens.
But if you have leftover baked cakes:
- Store in an airtight container in the fridge for up to 2 days
- Reheat in the oven at 350°F (175°C) for 6-8 minutes (the center won’t be as lava-like, but still delicious)
- Microwaving works in a pinch, 20-30 seconds, though you lose some texture
For unbaked, prepped ramekins:
- Refrigerate for up to 24 hours (covered tightly)
- Freeze for up to 1 month; bake straight from frozen at 425°F, adding 3-4 minutes to the bake time.
FAQ
Can I use milk chocolate instead of dark? You can, but the result will be much sweeter and the cake won’t have that deep, rich chocolate flavor. If you do use milk chocolate, cut the powdered sugar down by about 1/4 cup.
My center wasn’t runny. What went wrong? Overbaking is almost always the culprit. The center should look soft and slightly jiggly when you pull it out. Check your oven temperature with a thermometer since many ovens run hot. Also, ramekin size matters. If yours are smaller than 6 oz, reduce the bake time.
Can I use salted butter? Yes. Just skip the additional sea salt in the recipe so it doesn’t get too salty.
Why did my cake stick to the ramekin? The ramekin wasn’t prepped thoroughly enough. Every inch of the inside needs butter and cocoa powder coating. Don’t rush this step.
Do these taste good without ice cream? Yes. But honestly, the contrast of warm molten chocolate with cold vanilla ice cream is one of those food combinations that’s hard to top. Try it at least once.
My chocolate seized when melting. How do I fix it? Seized chocolate means water got in. Add 1 teaspoon of warm cream or butter and stir vigorously. It should smooth out.
Can I double the recipe? Yes. Just double every ingredient and bake in 8 ramekins. No other adjustments needed.
Wrapping Up
You now have everything you need to make one of the most impressive desserts to ever come out of a home kitchen.
It’s the kind of thing that makes people put down their forks mid-bite just to say “wait, you made this?”
And the answer is yes. You did. In under 30 minutes.
Give it a go this week, and when that chocolate pours out onto the plate, you’ll understand why this recipe has been a restaurant staple for decades. And when you make it, come back and tell me how it went in the comments. Did you add anything to the center? Did you go full ice cream situation?
I’d love to hear about it. 🍫