I’m not gonna lie—I used to think chicken teriyaki was just a takeout thing.
You know, the kind you order when you’re too tired to cook and you want something that hits that perfect sweet-savory spot. But then I actually made it at home, and I realized I’d been missing out on something way better than what comes in those plastic containers.
Homemade teriyaki sauce? It’s ridiculously simple. And when you make it yourself, you control the sweetness, the saltiness, and you can actually pronounce every ingredient.
The chicken comes out tender and juicy with this gorgeous glaze that’s sticky in all the right ways. And the whole thing takes less time than waiting for delivery.
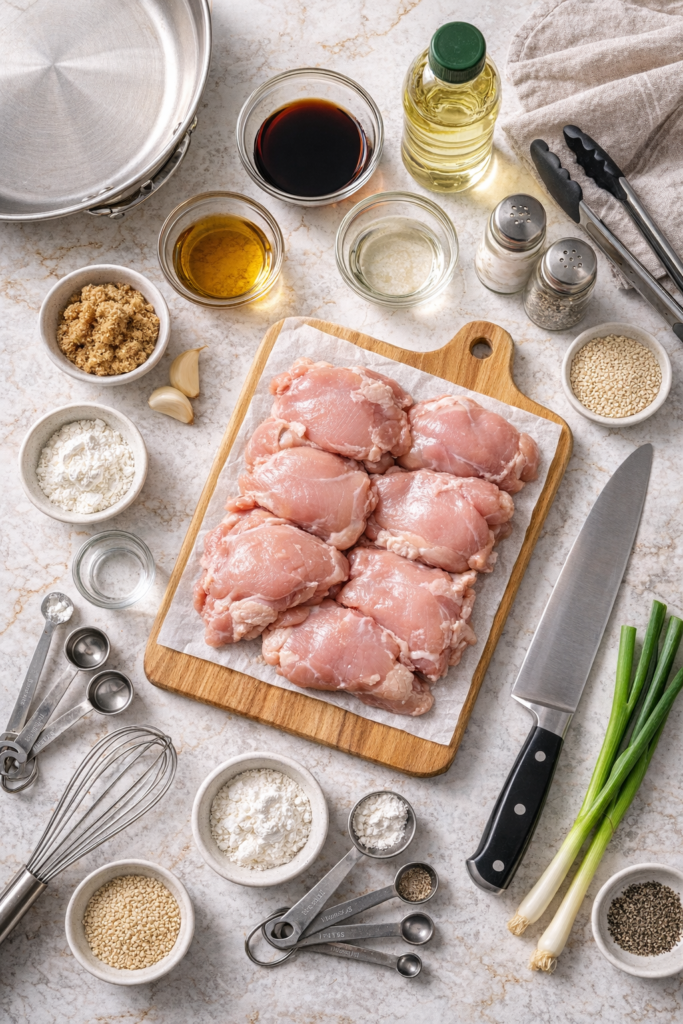
What You’ll Need
For the Teriyaki Sauce:
| Ingredient | Amount | Notes |
|---|---|---|
| Soy sauce (low sodium) | 1/2 cup | Foundation of the sauce |
| Mirin | 1/4 cup | Adds authentic sweetness |
| Sake | 1/4 cup | Can sub with white wine |
| Brown sugar | 3 tablespoons | Balances the saltiness |
| Garlic, minced | 2 cloves | Fresh is non-negotiable |
| Fresh ginger, grated | 1 teaspoon | Game-changer for flavor |
| Cornstarch | 1 tablespoon | Creates that glossy finish |
| Water | 2 tablespoons | For cornstarch slurry |
For the Chicken:
| Ingredient | Amount | Why It Matters |
|---|---|---|
| Boneless, skinless chicken thighs | 1.5 lbs | Juicier than breasts |
| Vegetable oil | 2 tablespoons | High smoke point |
| Salt | To taste | Enhances natural flavor |
| Black pepper | To taste | Adds subtle heat |
| Green onions, sliced | 2 | Fresh garnish |
| Sesame seeds, toasted | 1 tablespoon | Textural contrast |
Tools You’ll Need
✓ Large skillet or wok (12-inch is ideal) ✓ Small mixing bowl ✓ Measuring cups and spoons ✓ Whisk or fork ✓ Tongs or spatula ✓ Sharp knife and cutting board ✓ Grater or microplane (for ginger)
Pro Tips
🔥 Don’t skip the thighs.
I know breasts are popular, but thighs stay way more tender and juicy. They can handle the high heat without drying out, and they soak up that sauce like champions. Trust me on this one.
✨ Cornstarch is your secret weapon.
That glossy, sticky teriyaki glaze you see at restaurants? That’s cornstarch doing its thing. Mix it with cold water first before adding it to the hot sauce—this prevents clumping and creates that perfect sheen.
🔥 High heat = better caramelization.
You want your pan hot enough that the sauce starts to bubble and thicken quickly. This creates those beautiful caramelized bits on the chicken that make every bite taste restaurant-quality.
🫚 Fresh ginger matters.
Ground ginger won’t give you the same bright, zingy flavor. A small knob of fresh ginger goes a long way, and you can freeze the rest for next time.
⏱️ Let it rest.
Give your chicken 5 minutes to rest after cooking. This keeps all those juices inside instead of running all over your cutting board.
How to Make It

Step 1: Prep Your Chicken
Cut the chicken into bite-sized pieces, about 1-2 inches. Season with a pinch of salt and pepper.
I like cutting them on the larger side because they shrink a bit when they cook, and bigger pieces = juicier chicken.
Quick tip: Pat the chicken dry with paper towels before seasoning. Moisture is the enemy of a good sear.
Step 2: Make the Teriyaki Sauce
In a small bowl, whisk together:
- Soy sauce
- Mirin
- Sake
- Brown sugar
- Minced garlic
- Grated ginger
Set this aside. You’ll add it to the pan later, but having it ready means you’re not scrambling while your chicken’s cooking.
Why this sauce is better than store-bought: You control the sodium, skip the preservatives, and get actual pieces of garlic and ginger in every bite. Plus it takes like 2 minutes to make.
Step 3: Cook the Chicken
Heat the vegetable oil in your skillet over medium-high heat. Once it’s hot (you’ll see it shimmer), add the chicken pieces in a single layer.
Don’t overcrowd the pan. If you need to, cook in batches.
Let the chicken sear for 3-4 minutes on one side without moving it. You want that golden-brown color. Flip and cook another 3-4 minutes.
What you’re looking for:
- Golden brown crust on both sides
- Edges starting to caramelize
- No more pink in the center
Step 4: Add the Sauce
Pour your teriyaki sauce mixture over the chicken. Let it bubble and simmer for about 2-3 minutes.
The sauce will start reducing and the chicken will absorb all those flavors. Stir occasionally so everything gets coated.
You’ll hear it sizzle and see the sauce start to thicken around the edges. That’s exactly what you want.
Step 5: Thicken the Sauce
Mix the cornstarch with 2 tablespoons of cold water in a small bowl. Pour this into the pan while stirring.
The sauce will thicken up almost immediately. Keep cooking for another 1-2 minutes until it’s glossy and coats the chicken perfectly.
Watch it transform: The sauce goes from thin and watery to thick and clingy in about 30 seconds. Keep stirring or it’ll clump.
Step 6: Garnish and Serve
Remove from heat. Sprinkle with sliced green onions and toasted sesame seeds.
Serve over steamed rice, with stir-fried vegetables, or even in a rice bowl with edamame and avocado.
Timing Breakdown
| Step | Time | What’s Happening |
|---|---|---|
| Prep work | 5 min | Cutting chicken, mixing sauce |
| Cooking chicken | 8 min | Getting that perfect sear |
| Adding & reducing sauce | 3 min | Building flavor |
| Thickening | 2 min | Creating glossy coating |
| Total Time | 18 min | Faster than delivery! |
Substitutions and Variations
Can’t Find an Ingredient?
| Missing This | Use This Instead | Taste Difference |
|---|---|---|
| Mirin | Rice vinegar + sugar (1:1) | Slightly less sweet |
| Sake | Dry white wine or water | Less depth but still good |
| Brown sugar | Honey or white sugar | Different sweetness profile |
| Fresh ginger | 1/2 tsp ground ginger | Less zingy, more mellow |
| Cornstarch | Flour (use 2 tbsp) | Less glossy finish |
Dietary Swaps
🌱 Vegetarian/Vegan:
- Firm tofu (press it first!)
- Tempeh
- Thick eggplant slices
- Cauliflower florets
🚫 Gluten-Free:
- Use tamari instead of soy sauce
- Check that mirin is gluten-free
- Everything else is naturally GF
🌶️ Spicy Version:
- Add 1-2 tsp chili garlic sauce
- Sprinkle red pepper flakes
- Drizzle with sriracha before serving
🍯 Honey Teriyaki:
- Replace brown sugar with honey
- Adds floral sweetness
- Caramelizes differently (watch it closely!)
Make Ahead Tips
Sauce: Make it up to 3 days ahead. Store in an airtight container in the fridge. Give it a good stir before using.
Chicken: Cut and season the night before. Keep it covered in the fridge until you’re ready to cook.
Full dish: Keeps well in the fridge for up to 4 days. Reheat gently on the stove with a splash of water to loosen the sauce.
Meal prep hack: Make a double batch on Sunday. Portion it into containers with rice and veggies for easy weekday lunches.
Leftovers and Storage
Refrigerator: Store in an airtight container for up to 4 days.
Freezer: Keeps for up to 2 months. Thaw in the fridge overnight.
Reheating: Add a tablespoon of water to the pan and warm over medium heat. This brings back that saucy consistency without drying out the chicken.
Creative Leftover Ideas
🍜 Teriyaki Fried Rice Chop up the chicken and toss it with day-old rice, scrambled egg, and frozen veggies.
🥗 Asian Chicken Salad Slice the chicken over mixed greens with mandarin oranges, crispy wonton strips, and sesame dressing.
🌯 Quick Lunch Wrap Wrap it up with lettuce, shredded carrots, cucumber, and a drizzle of extra teriyaki sauce.
🍜 Ramen Upgrade Drop pieces into your instant ramen for a serious flavor boost.
Nutritional Breakdown
| Per Serving (1/4 of recipe) | Amount |
|---|---|
| Calories | 320 |
| Protein | 28g |
| Carbohydrates | 18g |
| Fat | 14g |
| Sodium | 1100mg |
| Sugar | 12g |
| Fiber | 0g |
Based on chicken thighs. Nutrition varies if using chicken breasts (lower fat, fewer calories).
Perfect Pairings
Rice Options
| Type | Why It Works | Cook Time |
|---|---|---|
| Jasmine rice | Fluffy, slightly sweet | 15 min |
| Brown rice | Nutty, more filling | 40 min |
| Cauliflower rice | Low-carb option | 5 min |
| Sticky rice | Traditional pairing | 20 min |
Side Vegetables
Quick stir-fry: Snap peas, bell peppers, and broccoli in sesame oil (5 minutes)
Steamed: Bok choy, edamame, or green beans (3-4 minutes)
Raw: Cucumber salad with rice vinegar and sesame seeds (no cooking!)
Complete Meal Ideas
🍱 Teriyaki Bowl Chicken + rice + steamed broccoli + edamame + sliced avocado + pickled ginger
🍜 Noodle Bowl Chicken over udon noodles + bok choy + soft-boiled egg + green onions
🥘 Family-Style Dinner Chicken + fried rice + stir-fried vegetables + miso soup + cucumber salad
Common Mistakes (And How to Avoid Them)
| Mistake | What Happens | The Fix |
|---|---|---|
| Overcrowding the pan | Steamed, not seared chicken | Cook in batches |
| Adding cold cornstarch directly | Clumpy sauce | Mix with cold water first |
| Using low heat | Pale, soggy chicken | Medium-high heat is key |
| Not drying the chicken | Won’t brown properly | Pat dry with paper towels |
| Overcooking | Dry, tough chicken | Use a meat thermometer (165°F) |
Time-Saving Hacks
⚡ Prep the night before: Cut chicken and mix sauce. Store separately in the fridge.
⚡ Use pre-minced garlic and ginger: The jarred stuff works just fine for this recipe.
⚡ Double the sauce: Make extra and freeze it in ice cube trays. Pop out 4-5 cubes next time you want teriyaki.
⚡ Buy toasted sesame seeds: One less thing to do when you’re hungry.
⚡ Instant pot chicken: Cook frozen chicken thighs on high pressure for 10 minutes, then toss with sauce.
Why This Recipe Actually Works
The sauce is perfectly balanced. Not too sweet, not too salty. You’re tasting actual ingredients instead of corn syrup and chemicals.
Mirin + sake = depth of flavor. Using both creates complexity that bottled sauce just can’t match.
Cornstarch creates that signature gloss. It’s the secret to that restaurant-quality shine without any weird additives.
Cooking the chicken IN the sauce means every bite is packed with flavor instead of just having sauce on top.
Fun fact: Traditional teriyaki is actually a cooking technique, not just a sauce. “Teri” means luster/shine and “yaki” means grilled. So you’re literally making “shiny grilled chicken.” 🤯
FAQ
Can I use chicken breast instead of thighs?
Yes, but watch the cooking time closely. Breasts dry out faster, so check for doneness at around 6-7 minutes total instead of 8. The internal temp should still be 165°F.
What if I don’t have cornstarch?
You can use flour, but it won’t give you the same glossy finish. Use 2 tablespoons of flour mixed with 2 tablespoons of water. The sauce will be slightly cloudier.
Can I grill the chicken instead?
Totally. Grill the chicken first until cooked through, then toss it with the sauce in a pan over medium heat for 2-3 minutes to let it soak in. You’ll get nice grill marks AND the glaze.
Is teriyaki sauce gluten-free?
Not usually, because most soy sauce contains wheat. But if you use tamari instead of regular soy sauce, then yes, this recipe can be gluten-free. Just double-check your mirin label too.
Can I make this without alcohol?
Yes. Replace the sake with water or low-sodium chicken broth, and use rice vinegar plus an extra tablespoon of sugar instead of mirin. It won’t be quite the same depth, but it’ll still be delicious.
How do I know when the chicken is done?
The internal temperature should be 165°F. If you don’t have a thermometer, cut into the thickest piece—the juices should run clear and there should be no pink inside.
Can I use this sauce for other proteins?
Absolutely. It’s amazing with:
- Salmon (cook 3-4 min per side)
- Shrimp (2-3 min total)
- Beef (slice thin, cook 2-3 min)
- Pork chops (5-6 min per side)
My sauce is too thick/thin. Help!
Too thick? Add a tablespoon of water at a time until you reach your desired consistency.
Too thin? Mix another teaspoon of cornstarch with a tablespoon of cold water and stir it in. Let it simmer for another minute.
Can kids eat this?
Yep! The sake and mirin alcohol cooks off completely, leaving just the flavor. If you’re concerned, use the alcohol-free substitutions above.
Does this freeze well?
It does! Freeze in portions for up to 2 months. The texture might be slightly different after freezing, but the flavor stays great. Thaw overnight in the fridge.
Wrapping Up
Once you make chicken teriyaki at home, takeout will never hit the same.
It’s faster than delivery, tastes better, and you know exactly what’s going into it. Plus, there’s something really satisfying about getting that perfect sticky glaze all by yourself.
Give it a try this week and drop a comment about how it turned out. Did you go with thighs or breasts? Make it spicy? Serve it over rice or noodles? I wanna hear all about your version and any tweaks you made!