I’m gonna be honest with you. I’ve tried a lot of lemon bars over the years, and most of them fall into one of two categories: either they’re so tart they make your face pucker for five minutes straight, or they’re basically just sugar bars with a hint of lemon somewhere in there.
But these? These are different.
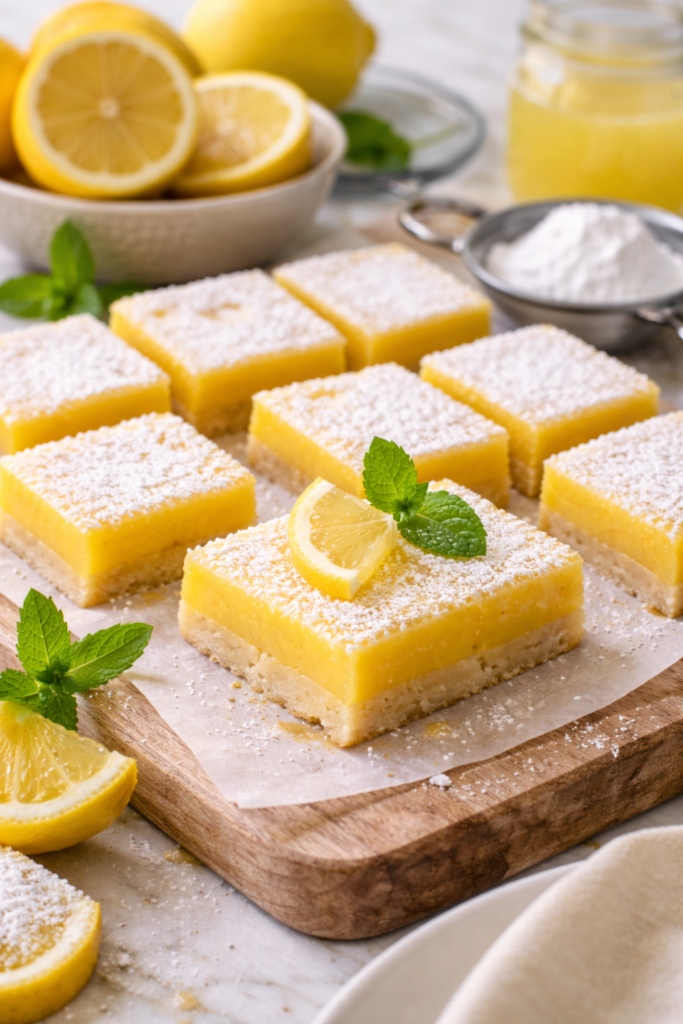
The first time I made them, I ate three in one sitting and had zero regrets about it. The buttery shortbread crust has this perfect crumbly texture that holds up without falling apart, and the lemon filling is tangy enough to taste like actual lemons but still sweet enough that you’re not making weird faces after each bite.
And the ratio is just right. You’re getting a good amount of crust without it being too thick, and the lemon layer is creamy and smooth without being gummy or overly jiggly.
If you’ve been looking for a lemon bar recipe that actually delivers on flavor and texture, this is it.
What You’ll Need
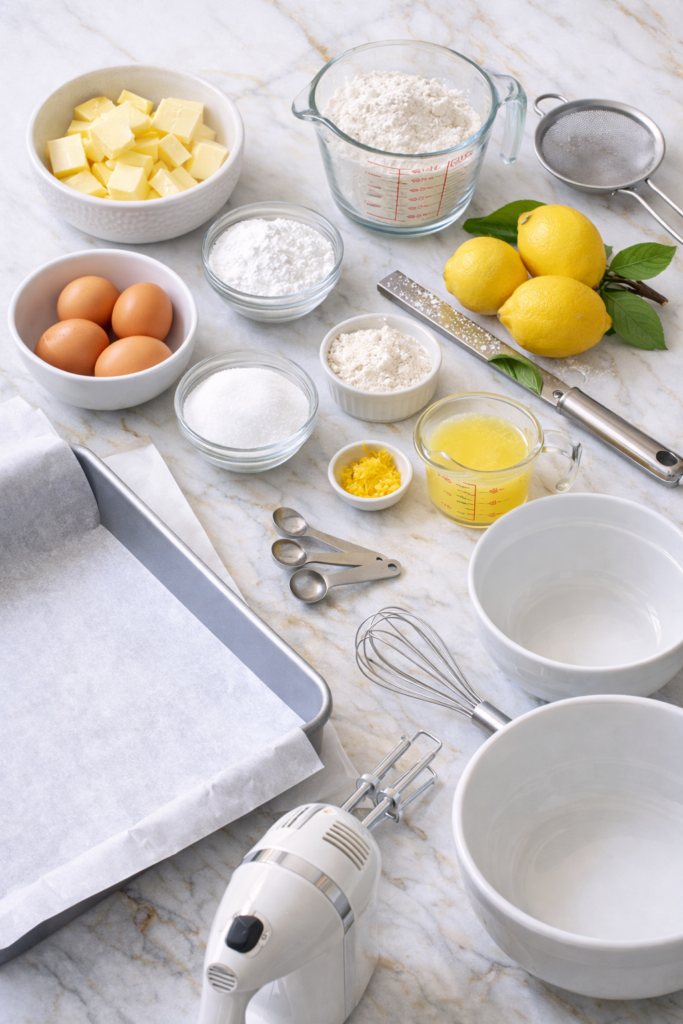
For the Crust
| Ingredient | Amount | Notes |
|---|---|---|
| Unsalted butter (softened) | 1 cup (226g) | Room temp is key |
| Powdered sugar | 1/2 cup (60g) | Sift if clumpy |
| All-purpose flour | 2 cups (250g) | Spoon and level |
| Salt | 1/4 tsp | Enhances flavor |
For the Lemon Filling
| Ingredient | Amount | Notes |
|---|---|---|
| Large eggs | 4 | Room temperature |
| Granulated sugar | 1 1/2 cups (300g) | White sugar only |
| All-purpose flour | 1/3 cup (42g) | Helps it set |
| Fresh lemon juice | 2/3 cup (160ml) | 4-5 lemons |
| Lemon zest | 1 tbsp | Packed |
| Salt | Pinch | Just a pinch |
For Topping
Powdered sugar – for that beautiful snowy finish ❄️
Tools You’ll Need
| Essential | Nice to Have |
|---|---|
| 9×13 inch baking pan | Microplane zester |
| Parchment paper | Citrus juicer |
| 2 mixing bowls | Fine mesh sieve |
| Whisk or electric mixer | Bench scraper |
| Measuring cups & spoons | Kitchen scale |
Pro Tips
🍋 Use Fresh Lemons Only
This might seem obvious, but it matters more than you think. Bottled lemon juice tastes flat and artificial compared to fresh.
You need about 4-5 medium lemons for this recipe, and the flavor difference is night and day.
📝 Don’t Skip the Parchment Paper
Line your pan with parchment paper that hangs over the edges. This creates handles that make lifting the bars out so much easier.
Trust me, trying to cut them while they’re still in the pan is a recipe for disaster.
⏰ Let Them Cool Completely
I know it’s hard to wait, but cutting into warm lemon bars will give you a mess.
The filling needs time to set properly, and that takes at least 2-3 hours at room temperature. If you’re impatient like me, you can pop them in the fridge for about an hour.
✨ Sift Your Powdered Sugar
When you’re dusting the top, use a fine mesh sieve to sift the powdered sugar. It creates an even, professional-looking layer instead of clumps.
Do this right before serving so it doesn’t get absorbed into the bars.
🔪 Zest Before You Juice
Always zest your lemons before you cut them open to juice them.
It’s so much easier to zest a whole lemon than trying to zest one that’s already been cut in half.
How to Make Lemon Bars
Step 1: Prep Your Pan
Time: 5 minutes
Preheat your oven to 350°F (175°C).
Line a 9×13 inch baking pan with parchment paper, making sure it hangs over the sides by about 2 inches. This will be your handle later.
Step 2: Make the Crust
Time: 5 minutes
In a large bowl, beat the softened butter and powdered sugar together until it’s light and fluffy. This takes about 2-3 minutes with an electric mixer.
Add the flour and salt, and mix until the dough just comes together. It should look crumbly but hold together when you press it.
Pro tip: Don’t overmix here. You want it just combined, not smooth like cake batter.
Press the dough evenly into the bottom of your prepared pan. Use your hands or the bottom of a measuring cup to get it flat and even.
Step 3: Bake the Crust
Time: 18-20 minutes
Bake for 18-20 minutes, until the edges are just starting to turn golden. The center should look set but still pale.
What to look for:
- Edges: Light golden brown
- Center: Set but pale
- Texture: Firm to the touch
Step 4: Prepare the Lemon Filling
Time: 5 minutes
While the crust is baking, whisk together the eggs and granulated sugar in a medium bowl until combined.
Add the flour, lemon juice, lemon zest, and a pinch of salt. Whisk until smooth and there are no lumps.
Why this works: Mixing while the crust bakes means your filling is ready to pour immediately. This helps it bind to the hot crust.
Step 5: Pour and Bake
Time: 20-25 minutes
When the crust comes out of the oven, immediately pour the lemon filling over the hot crust. Doing this while the crust is hot helps the filling set properly.
Carefully return the pan to the oven and bake for 20-25 minutes.
Doneness test: The filling should be set around the edges but still have a slight jiggle in the center. It will continue to set as it cools.
Step 6: Cool Completely
Time: 2-3 hours
Let the pan cool on a wire rack until it reaches room temperature.
Cooling timeline:
- 1 hour: Still warm
- 2 hours: Room temp (minimum for cutting)
- 3 hours: Perfectly set
- Refrigerate 1 hour: Fastest option
Step 7: Cut and Serve
Time: 10 minutes
Once completely cool, use the parchment paper handles to lift the bars out of the pan. Place them on a cutting board.
Use a sharp knife (wiped clean between cuts) to slice into squares. I usually do 4 cuts lengthwise and 3 cuts across for 12 larger bars, but you can make them smaller if you want.
Right before serving, dust generously with powdered sugar.
Cutting guide:
- 12 large bars: 4 cuts lengthwise, 3 cuts across
- 16 medium bars: 3 cuts each direction
- 24 small bars: 5 cuts lengthwise, 3 cuts across
Substitutions and Variations
| If You Want… | Try This… |
|---|---|
| Lime Bars | Swap lemon juice and zest for lime. More tropical, less tart. |
| Meyer Lemon Bars | Use Meyer lemons if you can find them. Sweeter and more delicate. |
| Gluten-Free | Use 1:1 GF flour for crust. Use 1/3 cup cornstarch for filling instead of flour. |
| Raspberry Lemon | Add 1/2 cup fresh raspberries on top before baking. |
| Extra Tangy | Increase lemon juice to 3/4 cup, reduce sugar to 1 1/4 cups. |
| Less Sweet | Reduce filling sugar to 1 1/4 cups. |
Make Ahead Tips
The Crust (2 days ahead):
Once baked, let it cool completely, cover tightly with plastic wrap, and store at room temperature.
Fully Baked Bars (5 days ahead):
Store finished bars in an airtight container in the fridge for up to 5 days. Wait to dust with powdered sugar until right before serving.
Freezer-Friendly (3 months):
Wrap individual bars in plastic wrap, then place them in a freezer bag. Thaw in the fridge overnight before serving.
Leftovers and Storage
| Storage Method | Duration | Best For |
|---|---|---|
| Room temperature (covered) | 2-3 hours | Immediate serving |
| Refrigerator (airtight) | Up to 5 days | Week-long snacking |
| Freezer (wrapped) | Up to 3 months | Long-term storage |
Storage tips:
✓ Store in the fridge after cooling completely
✓ Use airtight container to prevent drying out
✓ Add fresh powdered sugar before serving if needed
✓ Let sit 15-20 minutes before serving for best texture
✗ Don’t leave at room temp more than a few hours
✗ Don’t stack bars without parchment between layers
Nutritional Information
Per bar (based on 12 servings)
| Nutrient | Amount |
|---|---|
| Calories | 285 |
| Total Fat | 11g |
| Saturated Fat | 7g |
| Cholesterol | 85mg |
| Sodium | 125mg |
| Carbohydrates | 43g |
| Fiber | 0.5g |
| Sugar | 30g |
| Protein | 4g |
| Vitamin C | 8% DV |
Note: These are estimates and can vary based on specific ingredients used.
Frequently Asked Questions
Why are my lemon bars runny?
The filling probably didn’t bake long enough. It should have a slight jiggle in the center when you take it out, but the edges should be completely set.
Also, make sure you’re letting them cool completely before cutting. The filling needs time to firm up.
Can I use bottled lemon juice?
You can, but I really don’t recommend it. Fresh lemon juice has a brightness and complexity that bottled juice just can’t match.
It’s worth the extra five minutes to juice some lemons.
My crust is too hard. What happened?
You probably overmixed the dough or overbaked the crust.
Mix just until the dough comes together, and take the crust out as soon as the edges start to turn golden. It will continue to bake slightly when you add the filling.
Can I double this recipe?
Yes, but you’ll need to bake it in two separate pans.
Don’t try to bake it all in one larger pan because the baking time will be different and it won’t set properly.
How do I get clean cuts?
Use a sharp knife and wipe it clean with a damp cloth between each cut. This removes the sticky filling and gives you cleaner edges.
Also, make sure the bars are completely cool before cutting.
Do I need to refrigerate lemon bars?
Yes, because of the egg content in the filling. After cooling to room temperature, cover and refrigerate.
Take them out about 15-20 minutes before serving if you want them less cold.
Can I make these in a different pan size?
9×9 pan: Use half the recipe, bake crust 15 minutes, filling 18-20 minutes
8×8 pan: Use half the recipe, bake crust 15-17 minutes, filling 20-22 minutes
9×13 pan: Full recipe as written
What if I don’t have parchment paper?
You can grease and flour the pan, but getting the bars out will be tricky. Aluminum foil sprayed with cooking spray works in a pinch.
Meal Pairing Suggestions
These lemon bars pair beautifully with:
☕ Hot beverages: Black tea, green tea, coffee, cappuccino
🍰 Afternoon tea spread: Scones, finger sandwiches, fresh berries
🍽️ After dinner: Pairs well with light meals like grilled chicken or fish
🥂 Gatherings: Brunch buffets, baby showers, summer picnics
Recipe Timeline
<table> <tr> <th>Task</th> <th>Time</th> <th>Can Be Done Ahead?</th> </tr> <tr> <td>Prep ingredients</td> <td>10 min</td> <td>✓ Yes (day before)</td> </tr> <tr> <td>Make & bake crust</td> <td>25 min</td> <td>✓ Yes (2 days)</td> </tr> <tr> <td>Prepare filling</td> <td>5 min</td> <td>✗ No</td> </tr> <tr> <td>Bake filling</td> <td>25 min</td> <td>✓ Yes (5 days)</td> </tr> <tr> <td>Cool completely</td> <td>2-3 hours</td> <td>✓ Yes</td> </tr> <tr> <td>Cut & serve</td> <td>10 min</td> <td>✓ Yes (cut ahead)</td> </tr> <tr> <td><strong>Total active time</strong></td> <td><strong>45 min</strong></td> <td></td> </tr> <tr> <td><strong>Total time</strong></td> <td><strong>3.5 hours</strong></td> <td></td> </tr> </table>
Troubleshooting Guide
| Problem | Likely Cause | Solution |
|---|---|---|
| Crust is crumbly | Underbaked or too much flour | Bake until edges are golden; measure flour correctly |
| Crust is hard | Overbaked or overmixed | Bake just until set; mix until barely combined |
| Filling is runny | Underbaked | Bake until edges are set with slight center jiggle |
| Filling is gummy | Too much flour | Measure flour carefully; use 1/3 cup exactly |
| Bars won’t cut clean | Not cooled enough | Cool completely (2-3 hours) before cutting |
| Too tart | Not enough sugar | Increase sugar or reduce lemon juice slightly |
| Not lemony enough | Old lemons or not enough zest | Use fresh lemons; don’t skip the zest |
Wrapping Up
These lemon bars hit that sweet spot between tangy and sweet, and the shortbread crust is buttery without being heavy.
They’re simple enough to throw together on a weeknight but impressive enough to bring to a gathering.
And here’s the thing: once you make them, you’ll probably end up making them again within a week. They’re that good.
The combination of that buttery, melt-in-your-mouth crust with the bright, creamy lemon filling is something you just can’t get from a store-bought version. Plus, you control the sweetness and tartness levels, so you can make them exactly how you like them.
If you try this recipe, come back and leave a comment. I’d love to know how yours turned out or if you tried any of the variations. Did you go full tart? Add raspberries? Make them gluten-free? Tell me everything.